How to clean a mechanical keyboard safely comes down to one rule: dust first, liquid last, and never let either reach the electronics while the board is assembled. Most keyboards need 20 minutes of dry cleaning every week and a proper teardown two or three times a year. A deep clean takes longer, but the order of operations never changes — disconnect, photograph, dry-brush, remove keycaps, damp-wipe, dry fully, reassemble.
I’ve ruined one board with a spray bottle and learned from it. The switches looked fine after the wipe, then three weeks later the W key started double-triggering because alcohol had crept under the housing and loosened the lubricant. Same board, same lesson every time since: moisture gets applied to a surface, never sprayed into an opening.
Before you start, check what kind of board you actually own. Removable keycaps, hot-swappable sockets, soldered switches, and integrated rubber domes all need different amounts of disassembly, and a membrane keyboard is a different job entirely. The guide below walks through all seven stages in the order that causes the least damage.
Table of Contents
- 1What You Need
- 2Step-by-Step: How to Clean a Mechanical Keyboard Safely
- 31. Disconnect the Keyboard and Photograph Its Layout
- 42. Plan How to Clean a Mechanical Keyboard Safely for Its Design
- 53. Remove Loose Debris Without Moving the Switches
- 64. Remove Keycaps and Clean Them Separately
- 75. Clean the Exposed Plate and Case
- 86. Clean Around the Switches and Stabilizers
- 97. Let Everything Dry and Reassemble the Keyboard
- 10Common Mistakes
- 11Frequently Asked Questions
- 12Is compressed air safe for cleaning a mechanical keyboard?
- 13Can I use isopropyl alcohol on a mechanical keyboard?
- 14Can I open a hot-swappable mechanical keyboard and clean it?
- 15Can mechanical keyboard keycaps be washed?
- 16How often should I clean a mechanical keyboard?
- 17Conclusion
What You Need
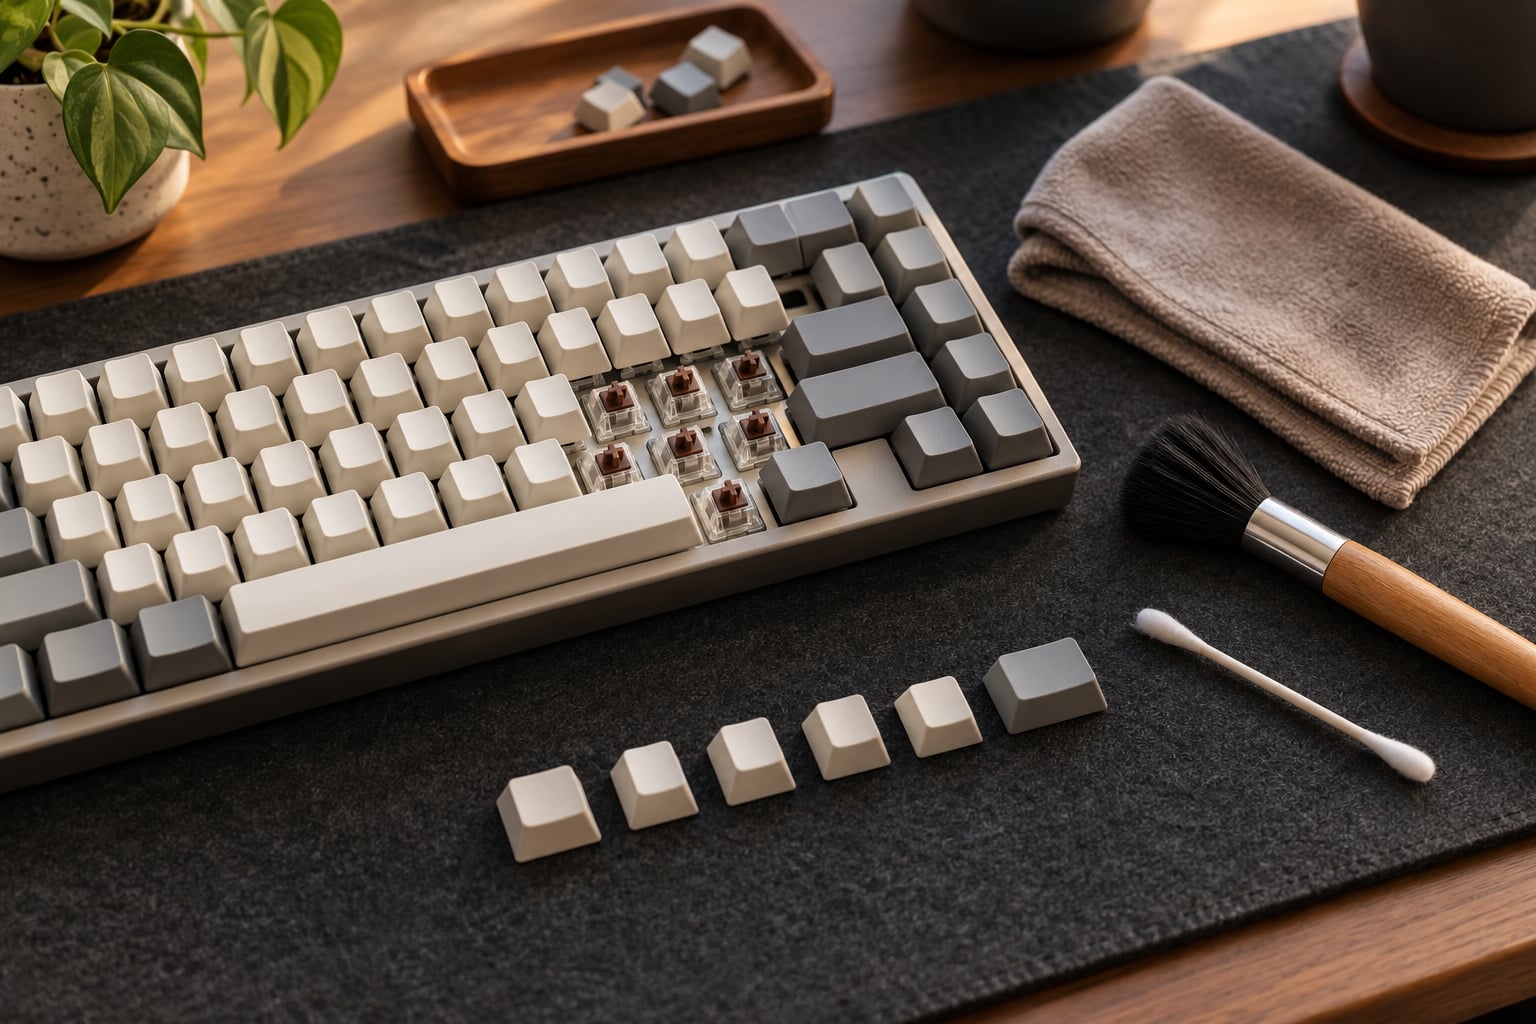
For a typical mechanical keyboard with removable keycaps, this is the whole kit:
- A wire keycap puller. The wire loop slides under the cap and releases the stem without prying on the plastic housing the way a cheap flat puller does.
- A soft-bristle brush. An anti-static brush is ideal; a clean, unused paint brush works fine in a pinch.
- A microfiber cloth for the case and keycap tops.
- Compressed air in a can, or an electric air duster, which is my preference for reasons that come up in step 3.
- 90% or higher isopropyl alcohol, plus cotton swabs, for damp work on the plate and around switch openings.
- A soft mat or clean towel to lay parts on, and a small dish or bowl for washed keycaps.
Cleaning putty picks up grime from between keys and out of the case corners where a brush won’t reach. It does not handle grease well, so pair it with the microfiber cloth rather than treating it as the whole job.
A manufacturer-approved switch lubricant matters only for two situations: keys that feel gritty after cleaning, or stabilizers on wide keys that rattle once the case has been handled. Lubricant is a finishing step, not a cleaning product.
Stop and go back to the manual — or to the manufacturer — when the case is glued shut, when the board uses an integrated membrane or dome layer, when the switches are soldered and you’re considering pulling them, or when you find corrosion. Liquid that has already reached a board and dried leaves a mineral residue that is a service job, not a wipe-down.
Step-by-Step: How to Clean a Mechanical Keyboard Safely
Seven stages, in this order. The first three are dry work; only stage 5 and part of stage 6 introduce any moisture at all.
1. Disconnect the Keyboard and Photograph Its Layout
Shut the board down and unplug the cable. For a wireless keyboard, turn it off at the hardware switch and disconnect it on the paired device or phone, so it doesn’t try to reconnect mid-clean.
Take a photo of the keycap layout before you touch anything. Every board has an odd key somewhere — an odd-size right Shift, an unusual Enter, a stepped Caps Lock — and that photo turns a 40-minute reassembly puzzle into a 5-minute job.
Work on a soft, dry surface away from drinks, and give the board a minute after unplugging so any residual warmth dissipates. The keyboard is now identified and disconnected; don’t reconnect it until stage 7.
2. Plan How to Clean a Mechanical Keyboard Safely for Its Design
Four designs, four different approaches:
- Hot-swappable with removable keycaps: the easiest case. Keycaps lift off, and switches pull straight out of their sockets without tools. Full teardown is realistic.
- Soldered mechanical: keycaps still come off, so surface and switch-area cleaning are the same. Opening the case may be fine, but desoldering switches to reach under them is not a routine clean.
- Integrated membrane or rubber dome: keycaps are often permanently attached or clipped into a thin plastic sheet. Clean the surface only, and skip keycap removal entirely.
- Nonstandard spacing or ortholinear: pullers still fit, but layout photo matters even more, and unusual spacing can hide more debris underneath.
Gasket-mounted boards just mean a tight, well-sealed case that traps dust at the edges — worth an extra brush pass at stage 5.
3. Remove Loose Debris Without Moving the Switches
Turn the board over and back again, tip it slightly, and brush or blow downward so debris can only fall away from the switches. Never shake it hard over your desk; crumbs bounce back up into the openings.
Work between the keycaps with the soft brush and short bursts of air, alternating rather than hammering one method. Canned compressed air that is held too close can blast dust straight past the switch housing and pack it deeper inside, which makes the problem worse.
This is also where an electric air duster earns its price. It produces no propellant, no condensation risk in cold rooms, and no liquid residue, and it never over-pressurises a switch. Keep the nozzle a few centimetres away and let it do the work.
4. Remove Keycaps and Clean Them Separately
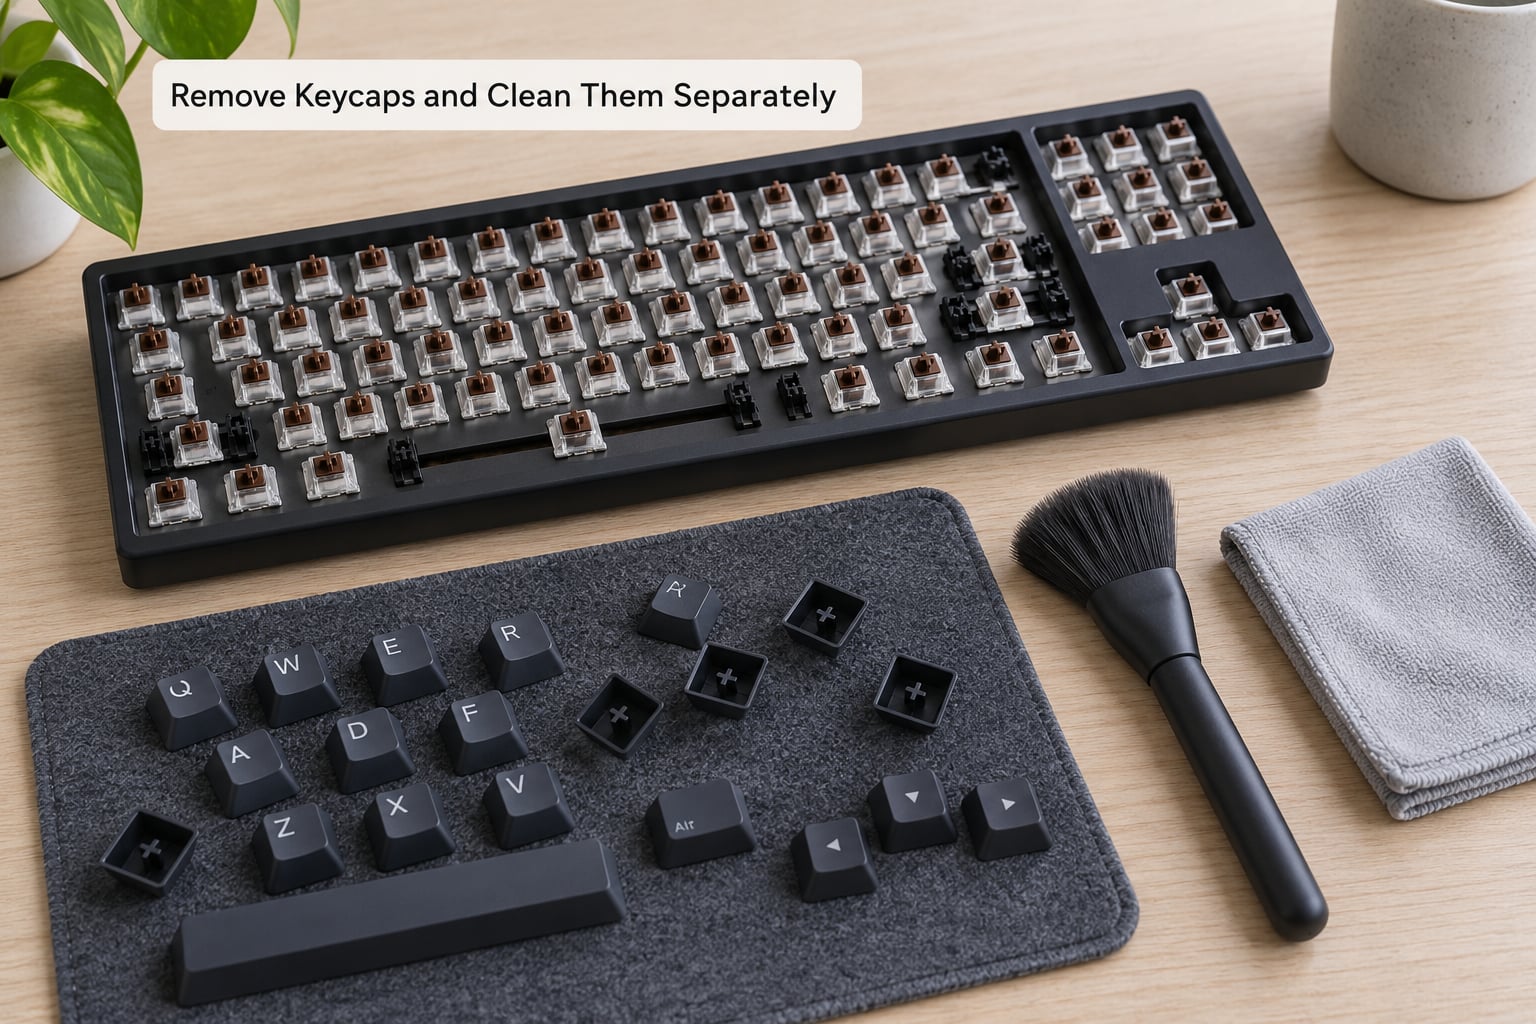
Slide the wire puller under one corner of the keycap, lift gently, then release the other corners one at a time. Pulling straight up on the centre of the cap is what bends stems and cracks housings — the puller distributes the force to the edges.
Take wider keys off slowly and evenly. Enter, Backspace and Spacebar sit on stabilisers: small wire supports with a plastic stem that sits looser than a normal key, so pull all sides at the same pace rather than levering one corner.
Watch what you lift out. If a keycap holds a metal weight underneath — common on artisan caps and some gaming sets — it needs individual handling, never a soak. Mark anything unusual or asymmetric with your photo nearby.
Wash only what the manufacturer allows. Double-shot PBT keycaps tolerate a mild dish soap soak in warm water and dry well. Single-shot ABS and PBT caps with a dye-sub or UV-printed legend often bleed or dull; those get a quick hand wash and a soft brush instead. Colourway kits and caps with double legends should skip the dish entirely.
5. Clean the Exposed Plate and Case
With the caps off, you can see what a year of desk life looks like: dust mats, hair, crumbs, drink film. Brush it off first with the dry brush, then move to moisture.
Dampen the microfiber cloth with 90%+ isopropyl alcohol until it is barely damp, not wet. Wipe the plate surface, the case walls, the inside of the top shell and the weight from the underside.
For tight spots, a cotton swab barely dampened with alcohol gets into switch openings and around stabiliser housings where a cloth cannot reach. Never flood an opening, never scrape with metal near a hot-swap socket, and never push residue downward into a stabiliser gap — that is exactly how rattle starts.
6. Clean Around the Switches and Stabilizers
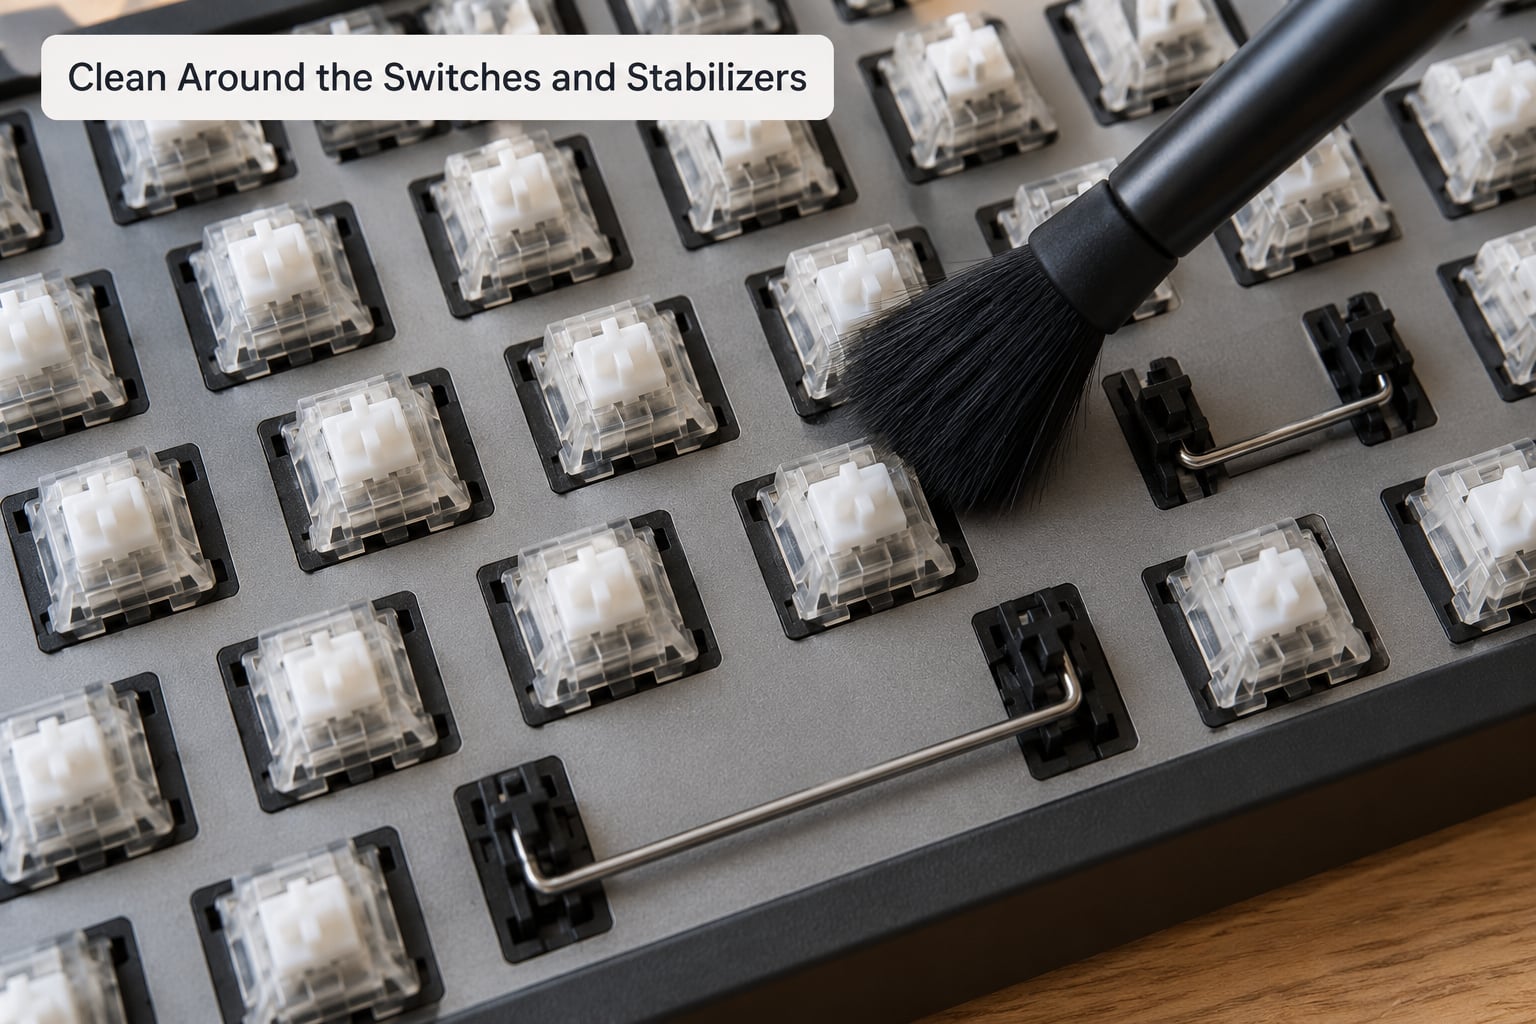
Switch cleaning is dabbing, not pouring. Dip a swab, touch it to a cotton pad or tissue first so it is not dripping, then trace around the stem opening and along the sides of the housing where grime collects.
If you own a hot-swappable board and a switch is genuinely sticky, pulling that switch out and cleaning or replacing it is a two-minute job with no tools. On a soldered board, the same situation means the switch stays put — work around it, and treat replacement as a separate job.
Add lubricant only where it earns its place: a thin film on stabiliser wires after cleaning, or on switch stems if a key still feels rough once every trace of grime is gone. Use what the switch or board maker approves, and less than you think you need.
7. Let Everything Dry and Reassemble the Keyboard
Everything. Keycaps from a soak, the case, the plate, the plate foam — all of it. Alcohol flashes off quickly, but water trapped inside a keycap or a stabilizer channel can sit for hours. Overnight on a rack is the safe default; a few hours near airflow is the floor.
Reassemble against your layout photo, pressing each keycap on with even downward pressure until it seats level. A key that sits proud means the stem needs another push, not more force.
Reconnect or re-pair, then test. Type a full line in a text field, hit Escape, and press every key twice to catch double-triggering. Stabiliser rattle, a dead key, or a key that only registers on a firm press all point back to something still wet, still dusty, or not fully seated.
Common Mistakes
Nearly every damaged board traces back to one of these:
- Spraying cleaner directly onto the keyboard. Liquid runs under keycaps and into the plate. Fix: apply to a cloth or swab, never to the board.
- Using water or household chemicals. Tap water leaves minerals, and window cleaner leaves film. Fix: 90%+ isopropyl for electronics, mild dish soap for washable keycaps only.
- Pulling two adjacent keycaps off together. The puller slips and the switch stem takes the load. Fix: one keycap at a time.
- Forcing a keycap. Something is under it — usually a stabiliser or a stubborn stem. Fix: lift all four corners evenly.
- Shaking debris into the case. It ends up packed inside the switches. Fix: brush and blow downward, out of the board.
- Opening a soldered keyboard unnecessarily. Case screws on an unserviceable board often break. Fix: check the manual first; clean what you can reach.
- Reassembling before parts dry. The most common cause of dead or double-firing keys afterwards. Fix: overnight, then test.
A weekly pass takes about five minutes: unplug it, tip it over, brush and blow between the rows, wipe the keycap tops with a dry cloth. Do that and a full deep clean twice a year is usually enough.
And if a key stops registering after reassembly, stop pushing. Power down, wait for everything to be fully dry, reseat the keycap firmly, and test again. Still nothing after two attempts means the switch needs attention, not more cleaning.
Frequently Asked Questions
Is compressed air safe for cleaning a mechanical keyboard?
Short bursts from a safe distance are fine, and they are the fastest way to move crumbs between rows. The risks are holding the can too close, which can force dust past the switch housing and pack it deeper, and using a lot of it in a cold room, where condensation can form and settle on the board. An electric air duster avoids both problems because it has no propellant.
Can I use isopropyl alcohol on a mechanical keyboard?
Yes, at 90% concentration or higher, applied to a cloth or cotton swab rather than sprayed or poured. It evaporates fast and leaves no residue. Keep it off keycap legends that may bleed, and never flood a switch opening. Lower concentrations like 70% work for disinfecting the surface but take far longer to flash off.
Can I open a hot-swappable mechanical keyboard and clean it?
Yes, and this is where a full teardown is realistic. Once the case is open you can pull any switch out of its socket without tools, clean or replace it individually, and access the plate and PCB directly. Soldered boards still allow keycap removal and surface cleaning, but switches stay put unless you desolder them, which belongs to a separate job.
Can mechanical keyboard keycaps be washed?
Double-shot PBT keycaps usually can, in warm water with mild dish soap and a soak of about 30 minutes, then three or four rinses and a day of drying. Single-shot ABS caps, dye-sublimated and UV-printed legends, and caps with metal weights can bleed, dull or corrode. Check the manufacturer first, and never put keycaps in a dishwasher.
How often should I clean a mechanical keyboard?
A quick dry pass once a week keeps most boards in good shape: unplug, tip it over, brush and blow out crumbs, wipe the tops with a dry cloth. A full deep clean with keycap removal every three to six months, or whenever you notice sticky keys, visible grime or a rattle, is usually enough. Do more after a spill or if you eat at your desk.
Conclusion
The safe sequence is short and it never bends: disconnect first, identify the design, clear debris with dry tools, remove keycaps, damp-wipe with 90% isopropyl on a cloth, keep liquid out of every opening, then let everything dry fully before reassembly. If you have never done this before, start with the dry-brush method in stages 1 through 3 and skip the wet steps — it clears most of what makes a keyboard look tired, and it carries no risk to the electronics at all.