When an external drive is not showing up, work from the cable outward: reseat the connection, try a second port and a second computer, then open your system’s disk tool to see whether the drive is detected but unmounted. Most cases are a cable, port, power or drive-letter problem, and the data is usually still there. Budget 15 to 30 minutes, and stop before anything that formats.
The order matters more than the effort. Every step that changes a disk — initialising, formatting, the clean command, chkdsk /f — rewrites the structures that describe where your files live, and it can take a drive that was recoverable offline down to nothing.
Table of Contents
- 1What You Need
- 2Step-by-Step: What To Do When an External Drive Is Not Showing Up
- 31. Check the Connection and Power
- 42. Check Whether the Computer Sees the Device
- 53. Inspect the Drive and Choose a Safe Recovery Action
- 6Common Mistakes
- 7Frequently Asked Questions
- 8Why isn’t my external hard drive showing up in Disk Management?
- 9Why is my external hard drive displayed as unallocated in Disk Management?
- 10Why isn’t my external hard drive showing up in Disk Utility on my Mac?
- 11What should I do if Disk Utility First Aid failed on my Mac?
- 12Why isn’t Windows 11 detecting my hard drive even though the BIOS does?
- 13What are the signs of a failing hard drive?
- 14What to Do First
What You Need
You need very little, which is good, because the diagnostic tools are already on the machine. Gather this before you start:
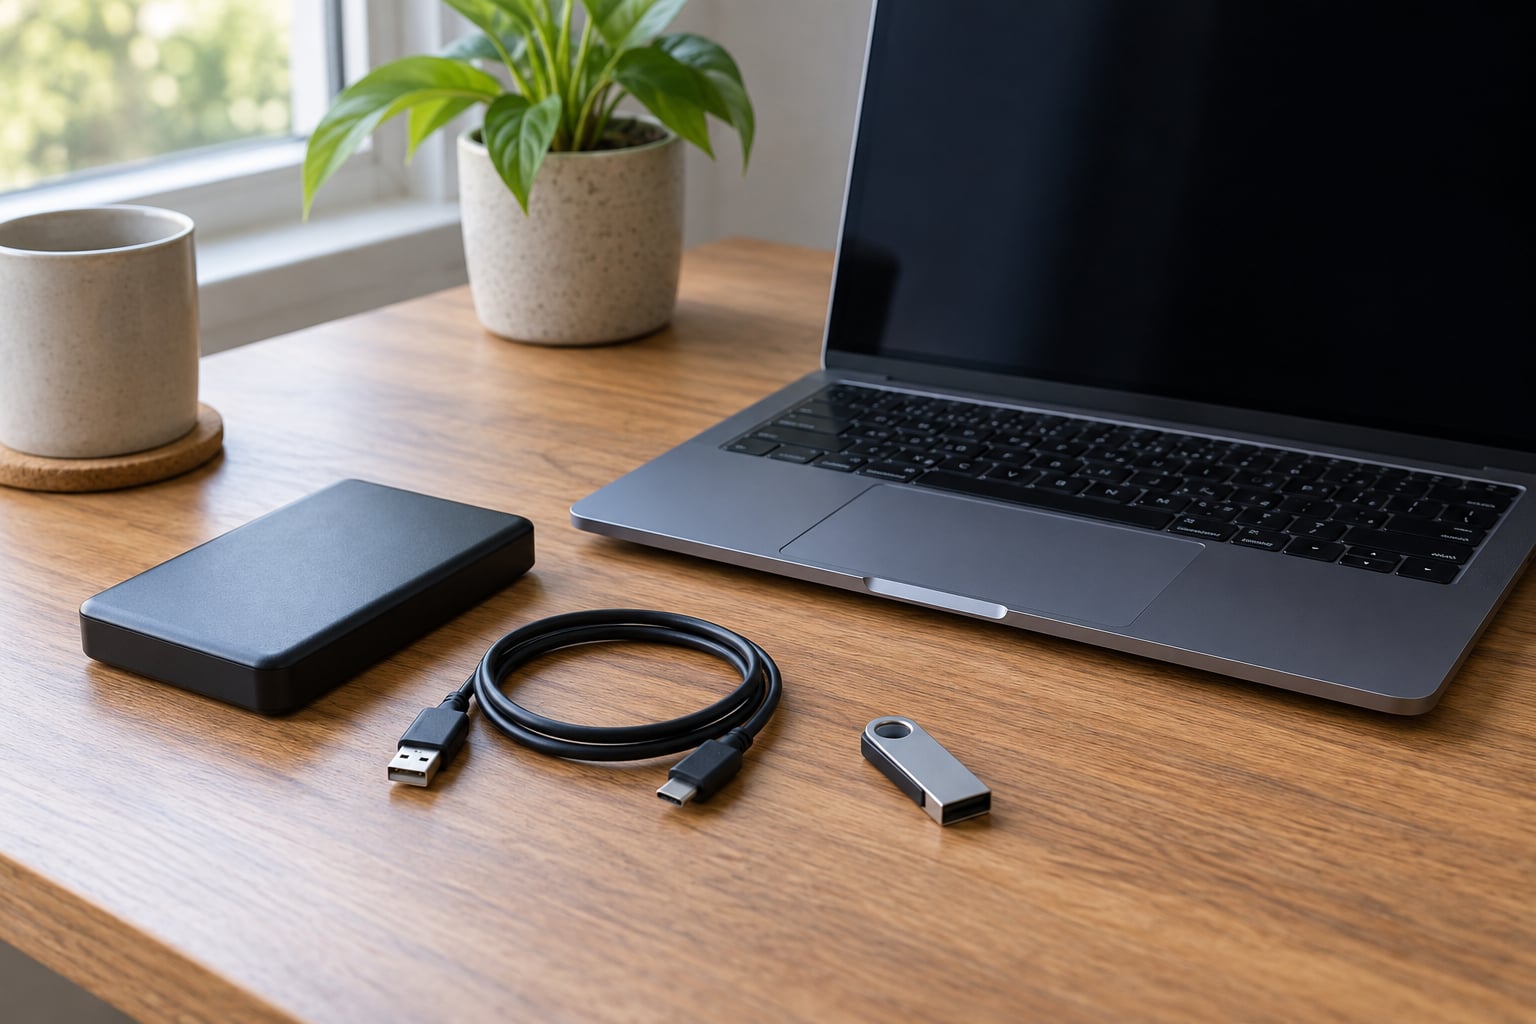
- The drive itself, plus the exact cable and power adapter it normally uses.
- A second USB port on the same computer, ideally one directly on the chassis rather than on a hub or dock.
- A second computer with a known-good port. This is the fastest way to split a computer problem from a drive problem.
- A USB flash drive or any other storage that works, to copy files off the external drive before you experiment with it.
- Optional: a SATA-to-USB adapter or a second enclosure if the drive is a bare 2.5-inch or 3.5-inch unit, and a SMART reader such as CrystalDiskInfo or
smartctl.
One warning before you begin: do not initialise, format, erase, clean or run a repair with fix flags on a drive that holds anything you have not backed up. Read the symptom table below first, so you know which side of that line you are on.
| What you see | What it usually means | Safe next step |
|---|---|---|
| Nothing in File Explorer, Finder or the file manager | The system has not enumerated the device at all | Reseat the cable, change port, test on another computer |
| Visible in BIOS or UEFI setup but absent in the OS | Hardware is alive; the driver or the mount layer is failing | Check Disk Management or Disk Utility, reinstall the USB driver |
| Disk listed as 0 bytes or No media | The enclosure bridge is talking, the platters are not | Test the bare drive in another enclosure or adapter |
| Disk present, space unallocated | The partition table was not read or was damaged | Stop. Do not initialise or create a volume yet |
| Disk marked Offline | The OS parked it, often after an unclean shutdown | Bring Disk Online from the right-click menu |
| Volume shows as RAW | File system not recognised, so no drive letter is offered | Try a repair or mount, then recover files rather than format |
| Prompt asking you to format the disk | Windows cannot mount the volume; formatting will erase it | Dismiss the prompt and recover data instead |
| Clicking, beeping or no spin | Mechanical failure in progress | Power down and stop. Do not repair in place |
Step-by-Step: What To Do When an External Drive Is Not Showing Up
Run these in sequence and stop as soon as the drive comes back. Each step is non-destructive unless it says otherwise.
1. Check the Connection and Power
Unplug the drive, wait about fifteen seconds, and push it back in until it seats with a click. Loose connectors are the most common cause, and a reseat costs nothing.
Then move it. Plug into a different port on the same machine, and connect directly to the computer rather than through a USB hub, monitor or docking station, since hubs frequently lack the current to spin up a 2.5-inch drive or a USB 3.0 SSD.
Swap the cable. This is the single fix that resolves the largest share of these cases, and it costs almost nothing. A USB cable that carries data has four thin wires inside a thick jacket, and those fail long before the jacket looks damaged, especially on cables that came bundled in a drive enclosure.
Check power next. Many 3.5-inch drives and some NVMe enclosures need more current than a single USB port can supply, and a drive that clicks but never appears is usually starving. Use the external power adapter the drive shipped with, or a powered hub, and confirm any power switch on the enclosure is actually set to on.
Finally, test on a second computer. If it appears there, your original machine is at fault rather than the drive. If it fails on both, move to the bare drive: swap the enclosure or connect it through a SATA-to-USB adapter, because enclosures and their bridge boards fail more often than people expect and they look identical to a dead disk from the outside.
2. Check Whether the Computer Sees the Device
The key question is whether the drive is missing entirely or merely unmounted. That single distinction decides everything that follows, and each platform answers it in its own place.
On Windows 11 or 10: open Win + X and choose Disk Management, or press Win + R, type diskmgmt.msc and hit Enter. Look at the lower pane, which lists physical disks above a striped bar for each volume.
If a new disk appears but has no coloured bar, the hardware is detected and the partition table is missing or unreadable. If a disk is listed as 0.0 GB with no media, the bridge is answering but the drive behind it is not. If nothing new appears at all, plug into a rear port, then open Device Manager by typing devmgmt.msc in the Run box, expand Disk drives and look for an entry with a yellow exclamation mark. Under View, enable Show hidden devices to expose stale entries from previous connections.
In File Explorer itself, check This PC and then the dropdown on the view menu. If the drive is there but blank or unresponsive, that is a mount problem, not a detection problem.
On macOS: open Spotlight, type Disk Utility and press Return. Every connected volume appears in the sidebar, even ones Finder will not show. If the disk is listed but greyed out, try Mount at the top of the window. Finder itself may simply be configured to hide it — open Finder, choose Settings from the menu, and under General confirm the External disks box is ticked. On older macOS versions the same checkbox lives in Preferences.
On Linux: run lsblk or sudo blkid in a terminal to see attached block devices and their file systems, and dmesg | tail -n 30 right after plugging in to read the kernel’s own report. Anything less than usb 5-1: new SuperSpeed USB device followed by a storage attach line means the drive never enumerated. On GNOME, look under Other Locations; on KDE, the device usually appears in the sidebar automatically. A mounted but unreadable volume can still be reached from a file manager by typing its path.
Encrypted volumes complicate this. BitLocker, FileVault and LUKS volumes exist but stay invisible until a password is supplied. Look for a padlock icon in File Explorer or Disk Utility, or for a password prompt on mount. Nothing is broken; the volume is locked.
3. Inspect the Drive and Choose a Safe Recovery Action
Read the state your disk tool reports before you click anything, because the label tells you what is recoverable.
Offline means the OS parked the disk, often after a power cut. Right-click it and choose Bring Online. This is safe.
Unallocated means the partition table was not read. Do not initialise it. Initialising writes a fresh MBR or GPT to the disk, and choosing the wrong style of partition table can make the original one unrecoverable. Note the disk size and any text Disk Management shows, then move to recovery.
RAW means the volume exists but its file system was not recognised. Try File Explorer’s context-menu Repair first, which runs a check-only pass. Avoid chkdsk with the /f or /r flags, since those repair by writing to a drive that is already struggling.
No media or 0 bytes points at the enclosure or the drive behind it. Test the bare disk in a second enclosure before concluding the data is gone.
On macOS, run First Aid before anything else. Select the volume in Disk Utility, click the First Aid button, then run it and Mount again afterwards. If First Aid fails, note the error and stop — repeated runs on a failing disk rarely help. If the disk is listed but mounting fails with a message about the drive being in use, check whether a Finder window or a Time Machine backup still holds it open, and restart the Mac with the drive attached.
On Linux, sudo ntfsfix /dev/sdX1 repairs an NTFS volume that was not shut down cleanly, and sudo fsck -n /dev/sdX1 runs a read-only check on ext4. Both are worth a try when the file system is intact and the hardware is healthy.
Check the drive’s health before you copy anything. CrystalDiskInfo on Windows and smartctl -a /dev/sdX on Linux report the SMART status, and a drive that reads PASSED but has bad or pending sectors is one to retire rather than trust. A drive full of reallocated sectors is running out of spare area.
If you want your files back rather than a working drive, work down a recovery ladder. First, copy anything that will open to other storage. Second, image the whole disk before repairing it, so you always have an untouched copy to try again with. Third, use a recovery tool on the image. Fourth, and this is the honest endpoint, hand the drive to a professional lab when it clicks, beeps or reports unreadable sectors.
Mechanical drives typically last three to five years under normal use, and the warning signs arrive beforehand: clicking or grinding during access, sudden slowness on files that used to open instantly, files that will not copy, or a drive that vanishes under load.
Common Mistakes
Most of the damage in these situations comes from a well-meaning suggestion rather than from the hardware, and the top result for what to do when an external drive is not showing up is usually advice to initialise or format it right away.
- Initialising an unallocated disk. It is the first button Windows offers and it writes to the drive. Back up or recover the contents first.
- Accepting the format prompt. Windows and macOS will offer to format a volume it cannot mount. That prompt is a symptom, not a suggestion.
- Running chkdsk with /f or /r. Plain
chkdskis read-only. Adding those flags makes it rewrite file system structures, which can destroy metadata on a drive with failing sectors. - Using diskpart’s clean command. It wipes the partition table instantly. Save it for a drive you have already confirmed is empty.
- Plugging in and out repeatedly. Every cycle stresses a drive whose heads may already be failing, and on spinning disks it keeps the drive out of its sleep state.
- Leaving the drive on a hub. Bus-powered hubs undersupply current, and symptoms that vanish when you connect directly look like a phantom hardware fault.
- Ignoring error messages. The request to format, and the warnings in Disk Utility, describe real damage. They are information, not obstacles.
- Testing a dead drive on a machine with unbacked-up data. Keep the source machine clean. Copy recovered files somewhere else.
One more pattern is worth naming: the drive worked until a Windows or macOS update and then vanished. That usually means a driver regression or a partition-assignment change rather than hardware damage. Reboot first, then check whether a different port or a rollback of the update brings the volume back.
Frequently Asked Questions
Why isn’t my external hard drive showing up in Disk Management?
Disk Management shows only devices the system can talk to at the hardware level. If nothing appears, the drive never enumerated, which points at the cable, the port, the enclosure bridge or a dead drive. Reseat the cable, try a rear port, plug directly into the computer instead of a hub, and test on a second machine. If the drive works elsewhere, your computer’s USB controller or driver is at fault rather than the storage.
Why is my external hard drive displayed as unallocated in Disk Management?
Unallocated means the disk is detected but no readable partition table was found on it. A damaged table, an erased table or a misread caused it. Do not initialise the disk and do not create a new volume, since initialising writes a fresh MBR or GPT and can remove the original. Record the disk size shown, then recover the files with an image-first approach or recovery software before touching the partitions.
Why isn’t my external hard drive showing up in Disk Utility on my Mac?
Disk Utility lists disks that Finder may hide, so if the drive appears there, the problem is mounting rather than detection. Click Mount in the toolbar, and check Finder’s settings under the General tab so the External disks box is ticked. If the entry is greyed out, run First Aid on it, then restart the Mac with the drive attached. If the drive is not listed at all, test another cable, port and computer.
What should I do if Disk Utility First Aid failed on my Mac?
A First Aid failure means macOS could not repair the volume, which usually points at a file system that is badly damaged or a failing drive. Do not run it repeatedly and do not erase the disk. Try mounting again after a restart, then test the drive on another machine to rule out the computer. If the data matters, image the disk or move to recovery software, and treat a clicking or beeping drive as a job for a professional lab.
Why isn’t Windows 11 detecting my hard drive even though the BIOS does?
Listing the drive in BIOS or UEFI setup only proves the hardware answers on the bus. Windows adds four more steps: enumerating the device, loading a driver, reading the partition table and mounting the volume. Failures in any of those make the drive invisible in File Explorer while it still appears in setup. Check Disk Management, look for a flagged entry in Device Manager via devmgmt.msc, and reinstall or re-enable the USB driver.
What are the signs of a failing hard drive?
Watch for clicking, grinding or beeping during access, sudden slowness on files that used to open instantly, files that refuse to copy, corrupted archives that used to be fine, and a drive that disappears or reappears under load. Spinning drives usually last three to five years, and these symptoms typically appear before total failure. Check SMART status with CrystalDiskInfo or smartctl, and replace a drive that shows bad or pending sectors rather than waiting for it to stop.
What to Do First
If you landed here with a drive missing right now, do these four things in order and stop there. Reseat the cable at both ends, then move the drive to another port on the same computer. Plug it directly into the machine instead of a hub, with its power adapter attached. Try it on a second computer to learn whether the problem is the drive or the PC. Then open your disk tool — Disk Management on Windows, Disk Utility on Mac, lsblk on Linux — and read what it says before you click anything.
If the drive is there but unmounted, bring it online or mount it. If it is unallocated, RAW or prompting you to format, leave it exactly as it is and start recovery. And if it clicks, beeps or does not spin, power it down and take it to a lab.
The rule that protects you is simple: nothing you do should write to the drive until its contents exist somewhere else. This guide was checked against current guidance for Windows 11, current macOS and current Linux releases in 2026.