To free up disk space on a Mac, open System Settings > General > Storage, see which category is eating your drive, then delete large personal files, old iPhone backups, unused apps and cached data until the free space figure climbs. Most people reclaim 20 GB or more in one sitting, and the whole job takes about 15 minutes.
If you want the fast version before you read the details, here is the order I would work in:
- Open the Storage panel and read the bar before you delete anything.
- Empty the Trash, because deleted files sit there until you do.
- Clear browser caches and the contents of your user cache folder.
- Delete old iPhone and iPad backups from the MobileSync folder.
- Purge local Time Machine snapshots using Terminal.
- Move your Photos library and video files to iCloud or an external SSD.
None of this needs third-party software. Apple built almost everything you need into the Mac, and the forum consensus I found while researching this is that the built-in tools beat one-click cleaner apps, which tend to advertise more space than they deliver and ask for administrator access.
Table of Contents
- 1What You Need
- 2Step-by-Step: How to Free Up Disk Space on a Mac
- 3Check Storage and identify what is using space
- 4Delete large files and folders
- 5Empty the Trash and clear Downloads
- 6Clear browser data and caches
- 7Remove unused applications
- 8Check for large hidden files and old backups
- 9Verify that your Mac has more free space
- 10Common Mistakes
- 11Frequently Asked Questions
- 12Why is my Mac still full after I deleted big files and emptied the Trash?
- 13What is System Data, and is it safe to clear it?
- 14Is it safe to delete anything inside ~/Library/Caches?
- 15How much free space does a Mac need to run properly?
- 16Do iPhone backups on a Mac really take up that much space?
- 17What is the best free Mac cleaner software?
- 18Conclusion
What You Need
Three things, and none of them cost anything.
An administrator account. Removing apps and clearing system-level caches asks for your password. A standard account can clear browser caches and delete personal files, but not much beyond that.
A current backup. Before you start pulling things out of Library folders, connect an external drive and run a Time Machine backup or a cloud sync. You do not need one for the quick wins, but you absolutely want one before you touch anything in the hidden-files step below. Disk cleanup on a Mac is safe when you know what a folder is, and much less safe when you are guessing.
The built-in Storage panel. On Ventura and newer, it lives in System Settings > General > Storage. On Monterey and earlier, open the Apple menu > About This Mac and use the Storage tab. Apple silicon and Intel Macs use the same paths, so nothing changes between them here.
One version note that confuses people: older macOS releases called the same category Other storage. macOS Monterey renamed it System Data. Both labels mean the same thing, so an article that tells you to hunt down Other storage on a Sequoia Mac is out of date.
Step-by-Step: How to Free Up Disk Space on a Mac
Check Storage and identify what is using space
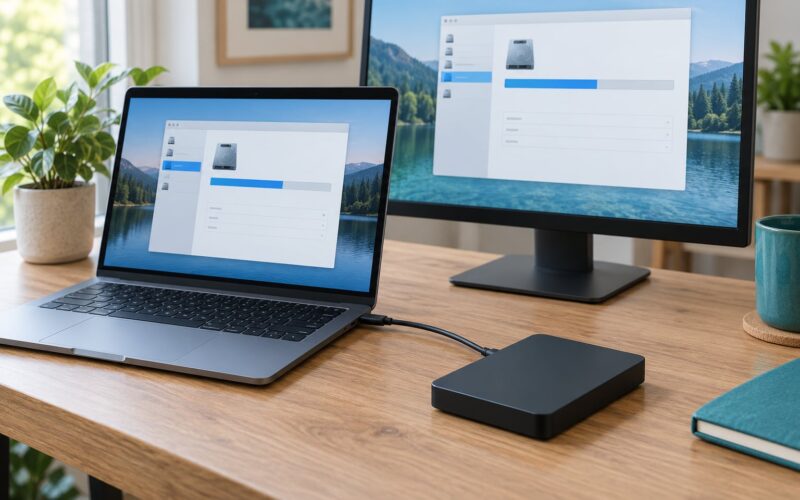
Open System Settings > General > Storage and wait for the bar to finish calculating. You will see your capacity, a coloured breakdown of what is using it, and a line for free space at the bottom. Read the largest categories first rather than starting with random folder hunting.
Here is what each category usually contains and what actually shrinks it:
- Applications — games, creative apps and developer tools. Uninstall the ones you stopped using.
- Documents — Downloads, Desktop files and archives. Delete them or move them to an external drive.
- Photos — your photo library and edited video. Turn on Optimize Storage or move the library.
- System Data — caches, logs, local snapshots and old device backups. Clear caches, delete old backups, purge snapshots.
- macOS — the system itself and its updates. Nothing safe to do here.
System Data is the one that confuses people. It is a catch-all bucket, which is why it can jump by tens of gigabytes overnight with nothing obvious added. Caches, log files, Time Machine local snapshots, Mail attachments, iPhone backups, fonts and a few odd system services all land in it, and macOS refreshes the figure lazily.
Delete large files and folders
Open Finder and click the Storage view, or use the search field in a folder and set the Kind filter to Documents and sort by Size. The quickest method is to open any folder, press Command-I on the folder itself to see its total size in Get Info, and work down the biggest ones.
Downloads is usually the worst offender. Sort it by Date Added and you will find installer packages, archives and duplicate downloads that never got cleaned up after a project finished. Check Desktop and Documents too, since finished work tends to pile up there rather than in Downloads.
Be careful with hidden files. Press Command-Shift-Period in Finder to toggle them, but treat anything you cannot positively identify as untouchable until you have looked it up.
Empty the Trash and clear Downloads
Moving a file to the Trash does not free any space. The file stays on the drive until the Trash is emptied, and that one detail explains a lot of people who deleted 30 GB and saw nothing change.
Click the Trash icon in the dock, review the contents once, then choose Empty Trash. To stop the pile-up coming back, right-click the Trash and set Delete Items Removing the Trash to Immediately.
Clear browser data and caches
In Safari, use the History menu > Clear History and choose the timeframe you want, then confirm. Safari also keeps a lot of development cache that can grow to several gigabytes on a long-lived install.
In Chrome, open the three-dot menu > More Tools > Clear browsing data. Tick Cached images and files only, not cookies or passwords, unless you specifically want to sign out of everything.
In Firefox, open Settings > Privacy and Security > Clear data on startup and select Cache.
For user-level caches, open Terminal and run this to see what you are dealing with:
du -sh ~/Library/Caches
Then clear the contents. Select everything inside ~/Library/Caches with Command-A, confirm the delete, and empty the Trash. Delete the contents, not the Caches folder itself.
The same applies to ~/Library/Logs. macOS rebuilds all of this on demand, so nothing breaks. Apps may feel slower for the first launch after a wipe because they have to refetch their assets.
Remove unused applications
On Ventura and newer, open System Settings > General > Storage, click the Applications category, and use the delete button beside each app you no longer want. On Monterey and earlier, drag apps to the Trash from the Applications folder in Finder.
Dragging to the Trash removes the app bundle but leaves supporting files behind in ~/Library/Application Support, ~/Library/Preferences and ~/Library/Caches. A single creative app can leave several gigabytes of orphaned assets this way, which is why AppCleaner and similar tools exist if you want the leftovers swept too. Removing apps yourself is still the right first move.
Check System Settings > Users and Groups while you are in there. Old or shared user accounts hold their own Library folders, and each home folder runs tens of gigabytes on an active account.
Check for large hidden files and old backups
Use Finder’s Go to Folder shortcut, Command-Shift-G, and type the paths below one at a time. Look, do not blindly delete.
~/Library/Application Support/MobileSync/Backupholds iPhone and iPad backups. Each one is frequently larger than people expect, and several full device backups can reach well over 100 GB in total. Delete the ones for devices you no longer use or restore from.~/Library/Containers/com.apple.mail/Data/Library/Mail Downloadsholds Mail attachments that accumulate quietly for years./Library/Application Support/MobileSync/Backupis the same idea for backups made by other accounts on the Mac.
Time Machine keeps local snapshots on the startup disk, and those count toward System Data. You cannot delete them through Finder, but Terminal handles it cleanly:
tmutil listlocalsnapshots /
sudo tmutil deletelocalsnapshots 1000000000000
The first command lists them, the second purges them all. macOS recreates a fresh one at the next backup, so this is not permanent damage.
If you install development tools, two more folders tend to be huge: DerivedData under ~/Library/Developer, and package manager caches such as ~/.npm or ~/Library/Caches/Homebrew. Those are fully rebuildable. On an Intel Mac, virtual machine disk images under ~/Virtual Machines can also be compacted rather than deleted.
Verify that your Mac has more free space
Return to System Settings > General > Storage and look at the free space figure at the bottom of the window. macOS recalculates categories periodically, so a change may take a few minutes to appear. If a category looks stale, restart the Mac and check again.
Give yourself a target rather than stopping at whatever number appears first. Roughly 15 to 20 percent of your total capacity in free space keeps swapping and updates healthy, and a macOS update typically needs around 25 GB available before it will start. Check again in about a week, because System Data grows again and that is normal.
Common Mistakes
Deleting files you do not recognise. Anything inside /System, /Library/System or /private is macOS itself, and removing it causes problems that reinstalling the OS is the only fix for. If a folder name is unfamiliar, check what creates it before deleting anything inside it.
Moving files to the Trash and stopping there. The space is still being used until the Trash is emptied. This is the single most common reason someone thinks they cleaned up and nothing changed.
Deleting a Library folder instead of its contents. Delete the files inside ~/Library/Caches, not the Caches folder. Missing folders cause errors that only clear after a restart.
Removing Application Support wholesale. That folder holds app data, not just cache, and deleting it resets licences, preferences and game saves.
Treating a cache clear as a data delete. Caches are rebuilt and cost you nothing but time. Data deletion is for photos, videos and archives you actually no longer need.
Expecting free space immediately. APFS and the Storage panel both work lazily. Give it a few minutes, restart if a category looks wrong, and check again tomorrow.
One more that deserves its own line: if your Mac says its startup disk is almost full and refuses to install an update, free at least 25 GB first. Updates fail on smaller margins than you would expect.
Frequently Asked Questions
Why is my Mac still full after I deleted big files and emptied the Trash?
APFS keeps local Time Machine snapshots, which hold references to files you deleted. Until those snapshots are purged, the blocks stay reserved. Run tmutil listlocalsnapshots / followed by sudo tmutil deletelocalsnapshots 1000000000000 in Terminal, restart, and the space usually returns. If it still looks wrong, the Storage panel is recalculating lazily and updates within a few minutes.
What is System Data, and is it safe to clear it?
System Data, called Other storage before macOS Monterey, is a catch-all bucket for caches, logs, Time Machine local snapshots, Mail attachments and old device backups. Clearing caches and old backups inside it is safe because macOS rebuilds them. What is not safe is deleting folders you cannot identify, since some system services depend on files that look like ordinary cache data.
Is it safe to delete anything inside ~/Library/Caches?
Yes, deleting the contents is safe, and it is what most Mac users do first. Select everything inside the folder with Command-A, delete, then empty the Trash. Leave the Caches folder itself in place. Apps rebuild what they need on next launch, so expect the first run of each app after a wipe to be slower than usual. This is well-trodden territory on the Mac community forums.
How much free space does a Mac need to run properly?
Aim for 15 to 20 percent of your total capacity in free space. That is what keeps memory swapping, app launching and updates from struggling. For a macOS update specifically, allow roughly 25 GB of free space before you start it. Running permanently close to full is what causes crashes and the sluggish behaviour people try to clean up, not the cleanup itself.
Do iPhone backups on a Mac really take up that much space?
They can. A single backup of a phone with a large camera roll regularly passes 100 GB, and Mac owners often keep several without realising it. Check ~/Library/Application Support/MobileSync/Backup using Finder’s Go to Folder shortcut. Each folder there is named after a device, so you can match it to a phone you still own before deleting anything. Your current phone re-creates its backup on demand.
What is the best free Mac cleaner software?
For visualising what is using space, GrandPerspective is the free tool Mac owners mention most often, and DaisyDisk is a well-regarded one-time-purchase alternative. Both draw a map or tree of your folders so you can see the real hogs instead of guessing. For removing app leftovers, AppCleaner is small and does one job. Paid suites add monitoring, but the built-in Storage panel and Finder handle most cleanups on their own.
Conclusion
Start by opening System Settings > General > Storage and reading the bar, because everything after that depends on what it tells you. Empty the Trash, remove large files from Downloads and your desktop, uninstall the apps you stopped using, and clear the contents of your caches. Take a backup first if you plan to touch backups or Library folders. Check the free space figure again after a restart, and keep at least 20 percent of the drive open so it does not fill up again next month.