Updating Ubuntu safely means one thing above all: a recoverable system before you change anything. Refresh the package list, apply only the standard upgrades, reboot on purpose, and verify the result. Routine updates on an LTS release are low-risk when you take a backup first and stay on the standard apt path.
The scary stories on Ask Ubuntu and r/Ubuntu are almost never about routine package updates. They are about jumping to a brand-new release days after launch, on machines with proprietary drivers or Secure Boot, over SSH, with no way back in. Avoid those situations and the procedure takes about ten minutes on a healthy desktop.
This guide covers Ubuntu 22.04 LTS, 24.04 LTS and 26.04 LTS, both desktop and server, as of 2026. It includes the parts nearly every other guide skips: how to simulate the upgrade first, what to back up specifically, and how to recover when something does break.
Table of Contents
- 1What You Need
- 2Step-by-Step: How to Update Ubuntu Safely
- 3Step 1: Check Your Ubuntu Version and Release Status
- 4Step 2: Back Up Important Files and Recovery Data
- 5Step 3: Prepare the System – the Part of How to Update Ubuntu Safely People Skip
- 6Step 4: Install All Pending Package Updates
- 7Step 5: Check Whether a Release Upgrade Is Available
- 8Step 6: Run the Release Upgrade and Respond Carefully
- 9Step 7: Reboot and Verify the Result
- 10Common Mistakes
- 11“E: Could not get lock /var/lib/dpkg/lock-frontend”
- 12“dpkg: error processing package … E: Sub-process /usr/bin/dpkg returned an error code”
- 13“The following packages have unmet dependencies”
- 14“Hash Sum mismatch” or “404 Not Found”
- 15“No new release found” when you expected one
- 16No network after an update
- 17The machine will not boot after a kernel update
- 18Frequently Asked Questions
- 19Will updating Ubuntu delete my files?
- 20Does Ubuntu update automatically?
- 21How long should I wait after a new Ubuntu release before updating?
- 22Should I use apt upgrade or apt full-upgrade?
- 23How can I update a remote Ubuntu server without locking myself out?
- 24What happens if I turn my computer off during an update?
- 25Conclusion
What You Need
Five things, and only one of them is software. Have administrator access, a plugged-in machine, roughly 2 GB of free disk for a package update and considerably more for a release upgrade, an internet connection that will not drop mid-download, and a backup you have actually opened and looked at.
A backup you have never tested is a hope, not a plan. The single most common regret in forum threads about broken upgrades is not a wrong command; it is discovering the backup was empty when it mattered.
| Backup method | What it covers | Downtime | How to undo the update |
|---|---|---|---|
| Full disk image | Everything, including /boot and partition layout | Machine is out of service during the image | Wipe the partition and restore the image |
| LVM or VM snapshot | Whole filesystem(s) in seconds | Almost none | Merge the snapshot back with lvconvert --merge or the hypervisor’s revert |
| rsync of key directories | Home, /etc, and anything you customised | None | Copy the directories back |
| Timeshift | System files, snapshots on a schedule | One reboot into the snapshot | Boot into an earlier snapshot |
Requirements shift with installation type. An LTS desktop mostly needs the backup and free disk space. A laptop on battery should not be updating at all; suspend the process or wait. A remote or production server needs a snapshot or disk image, a database dump, and a plan for getting back in if SSH stops working.
Step-by-Step: How to Update Ubuntu Safely
Not all update methods carry the same risk. The first table is the single most useful thing on this page: it tells you which command changes what, and how to reverse it.
| Method | What it changes | Risk level | How to undo it |
|---|---|---|---|
sudo apt update | Only refreshes the cached list of available packages. Installs nothing. | None | Nothing to undo |
sudo apt upgrade | Installs newer versions of installed packages. Refuses to remove anything. | Low | Downgrade individual packages with apt install pkg=version |
sudo apt full-upgrade | Same as upgrade, plus removing obsolete packages and installing new dependencies. | Medium | Check /var/log/apt/history.log, then downgrade |
sudo apt dist-upgrade | Alias for full-upgrade. Moves you to a newer kernel stack and can remove packages. | Medium | Previous kernel stays in GRUB; boot it from Advanced Options |
| Third-party PPA or kernel installer | Pulls unsigned packages from outside Ubuntu’s archive. | High | Remove the repository, reinstall from the official archive |
Step 1: Check Your Ubuntu Version and Release Status
Start by knowing what you are running, because the right update path depends entirely on it.
lsb_release -aExpected output looks like this:
Distributor ID: Ubuntu
Description:    Ubuntu 24.04.1 LTS
Release:        24.04
Codename:       noble
On a desktop, the same information sits under Settings, then About. What you are really after is support status. An LTS release gets standard maintenance for five years, then extended security maintenance for a further period. Past that it is end of life and receives nothing at all.
Routine package updates and release upgrades are different jobs. Updating packages inside your current release is routine and repeatable. Moving from 24.04 to 26.04 replaces thousands of packages and is a one-way trip without a backup.
Step 2: Back Up Important Files and Recovery Data
Be specific about what gets copied, because “back up your stuff” is where people hand-wave. These are the directories that actually matter:
/home— documents, browser profiles, SSH keys, code, mail archives/etc— anything you edited by hand, especially/etc/fstaband your APT sources- Application data outside the home directory, such as database dumps and container volumes
/var/lib/dockervolumes and any bind-mounted host paths
sudo rsync -aAXv --exclude='.cache' /home/$USER/ /mnt/backup/home/
sudo mysqldump --all-databases > /mnt/backup/db.sql
sudo cp /etc/fstab /etc/apt/sources.list /mnt/backup/ 2>/dev/null
Servers running PostgreSQL need a real pg_dumpall, not a file copy of the data directory. Anything with a database needs the same treatment, because the update process is free to stop services mid-dump.
Then confirm the copy is real:
ls -lh /mnt/backup/home/
du -sh /mnt/backup/home/
If that size does not roughly match your home directory, find out why before you continue. On a VM or VPS, take a snapshot at the platform level as well. It takes seconds and it is the fastest rollback path that exists.
Step 3: Prepare the System – the Part of How to Update Ubuntu Safely People Skip
Plug the machine into mains power. Save every document, close every application that writes to disk, and check free space:
df -h /A package update needs a couple of gigabytes of headroom. A release upgrade wants somewhere between 8 and 20 GB depending on your partitions, and running out of space halfway through is one of the classic ways to end up with a half-upgraded system.
On remote machines, open a second SSH session and leave it open. Do not close the first one. If a service restart drops your connection during the upgrade, that second window is your way back in. You also want console access or the hypervisor’s serial console, because a kernel update plus a bad initramfs can leave a server unreachable even with SSH running.
Servers should postpone the reboot. Set the package manager to hold the reboot rather than performing it mid-window, then schedule the restart for a maintenance slot.
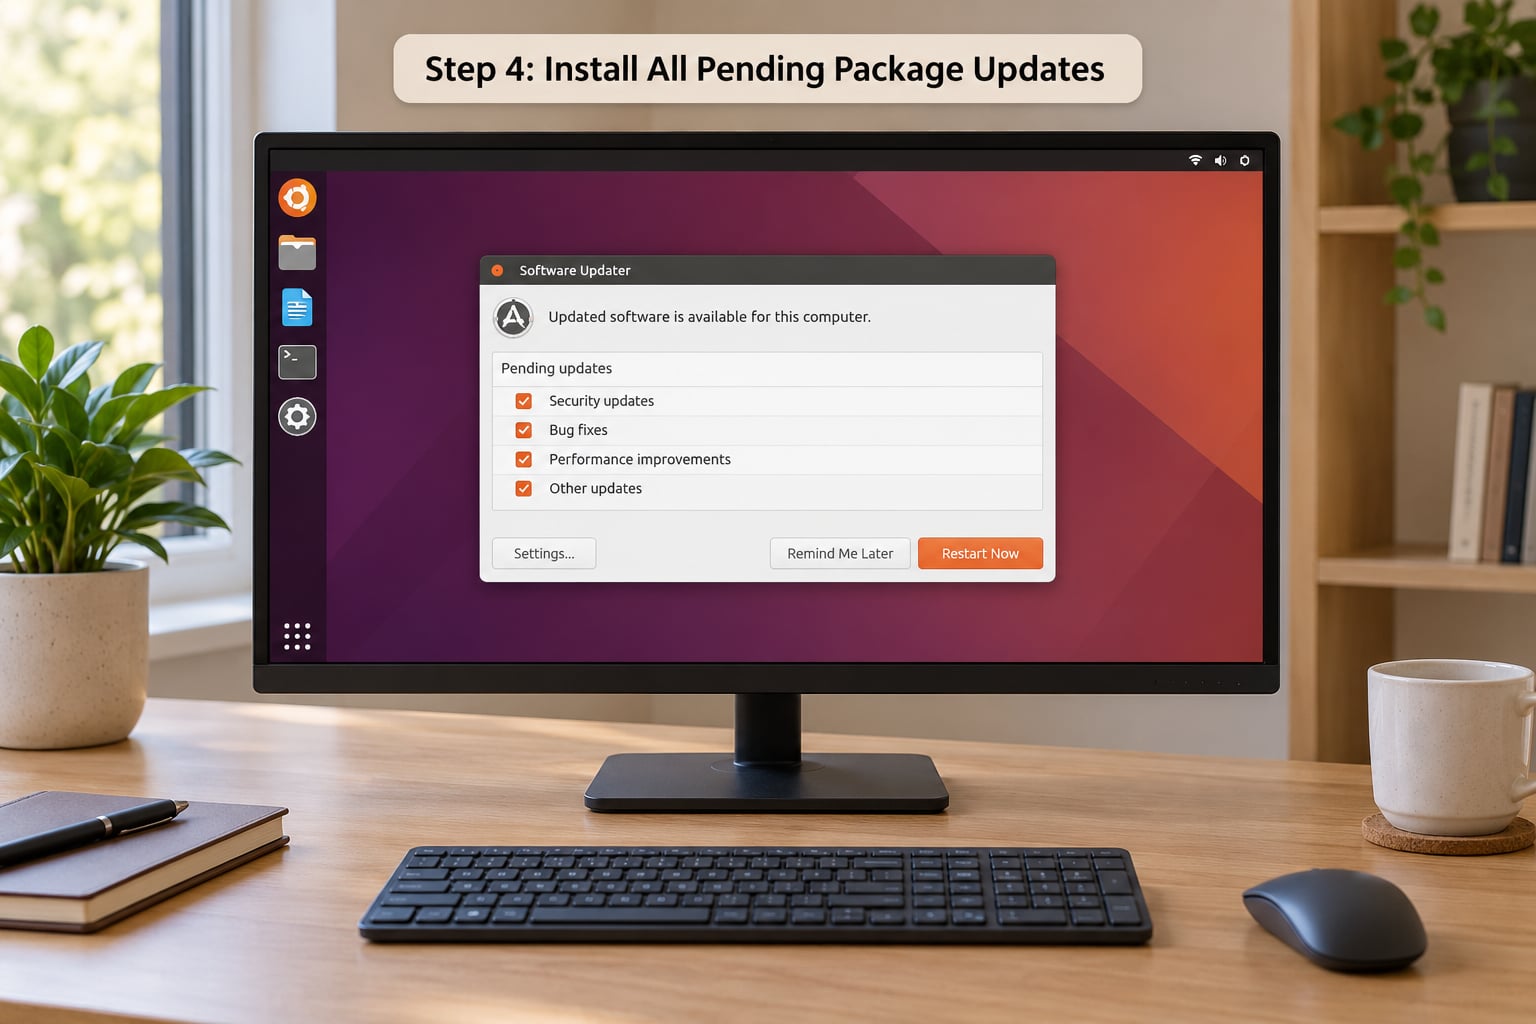
Step 4: Install All Pending Package Updates
Refresh the package list first, then see exactly what is on offer before you agree to any of it:
sudo apt update
apt list --upgradable
Expected output is a plain list, one package per line, with the available version appended. Nothing is installed at this stage. If sudo apt update prints errors about a mirror, stop and read the Common Mistakes section below; nothing good comes from installing against a half-downloaded index.
Now simulate the upgrade. This is the step no competitor on this topic covers, and admins on r/sysadmin ask for it constantly because the package list is not always what you expect:
apt upgrade --dry-runThe output tells you exactly which packages move and which get removed, with no changes made. Read it. If a package you depend on is on the removal list, hold it now rather than after it disappears:
sudo apt-mark hold your-package
apt upgrade --dry-run
Community threads such as the one on community.zammad.org show this pattern in the wild: admins holding application packages through a distribution upgrade rather than letting APT remove them and breaking a working service.
When the list looks right, apply it:
sudo apt upgradeUse apt upgrade, not a forced variant, for day-to-day work. The one-line difference is that upgrade refuses to remove a package to satisfy dependencies, which means it will stop and ask rather than guess.
Desktop users can skip the terminal entirely. Search for Software Updater and run it, or check the same list in Software & Updates under the Updates tab, where you can also choose between security updates only and all updates.
Step 5: Check Whether a Release Upgrade Is Available
Checking is free; committing is not. Ask first:
sudo do-release-upgrade -cThis checks without downloading or installing anything and simply reports whether a newer release is offered. On a desktop, the same check appears in Software & Updates under the Releases dropdown.
Two paths exist and they are not equivalent. An LTS-to-LTS move goes straight from one long-term support release to the next and is the supported path. Moving to an interim release, the numbered releases between LTS versions, adds risk: interim releases get roughly nine months of support, so you would be upgrading twice within two years.
Timing matters more than most guides admit. r/Ubuntu threads repeatedly report problems from upgrading to an LTS release before its first point release shipped; the community recommendation, made by Ubuntu’s own community team when 24.04.1 was delayed over known issues, was to wait for that .1 release. Phased rollout compounds this. Canonical pushes changes out gradually, so your machine may simply not be offered an update yet, which people routinely mistake for a broken update manager.
Step 6: Run the Release Upgrade and Respond Carefully
When you decide to go ahead:
sudo do-release-upgradeExpect this to take a while. Depending on connection speed and disk, a release upgrade commonly runs 20 to 60 minutes. The download happens first, then unpacking, then a long stretch of configuration where screen output scrolls continuously. That quiet stretch is normal, not a hang.
You will be asked a handful of questions: whether to keep a modified configuration file that a package wants to replace, whether to remove now-obsolete packages, and whether you want to install updates during the upgrade. When the config-file question appears, read the diff. A keep choice on a file you have edited is usually what you want; a keep choice on a package you have never touched is usually a mistake.
Removed packages are worth pausing on. APT lists what it intends to delete because it is genuinely obsolete. If something on that list is something you rely on, cancel, install it manually, and start again.
Keep the terminal open, keep the machine on power, and do not suspend a laptop halfway through. Interrupting dpkg mid-transaction is how you get a system that needs recovery work.
Step 7: Reboot and Verify the Result
Reboot when the tool says it is safe, not before. On a server, that means the maintenance window you picked in Step 3.
uname -r
lsb_release -a
apt list --upgradable
systemctl --failed
df -h /
Expected results: uname -r returns a kernel string matching the linux-image version you just installed, apt list --upgradable comes back empty, and systemctl --failed lists no failed units. If disk space is tight after a release upgrade, sudo apt autoremove --dry-run shows what would be cleaned without touching anything.
On a desktop with proprietary graphics or wireless, confirm the driver still loads before you close the lid and forget about it.
Common Mistakes
Every failure below starts with a literal error string. Find yours, read the cause, then apply the fix.
“E: Could not get lock /var/lib/dpkg/lock-frontend”
Another APT process holds the lock, or a previous run died and left it behind. Check for a real process first:
ps aux | grep -E 'apt|dpkg' | grep -v grepIf nothing is running, remove the stale locks and run sudo dpkg --configure -a to finish any interrupted configuration. Never delete these locks while a real process is using them. That is how you corrupt an installation outright.
“dpkg: error processing package … E: Sub-process /usr/bin/dpkg returned an error code”
A package’s maintainer script failed. Fix configuration, then repair dependencies:
sudo dpkg --configure -a
sudo apt-get install -f
sudo apt-get clean
If a specific package keeps failing, inspect it with dpkg --audit and read the real reason in journalctl -xe. The literal dpkg output usually names it.
“The following packages have unmet dependencies”
Usually a third-party repository that has not published packages for the new release yet. Comment out the offending line in your APT sources, run sudo apt update, then retry. Do not force the install.
“Hash Sum mismatch” or “404 Not Found”
This is an infrastructure problem, not your system. Check status.ubuntu.com before touching anything, then clear the cached index:
sudo rm -rf /var/lib/apt/lists/*
sudo apt update
Readers searching “Ubuntu archive mirror down” and “Ubuntu still down” are usually hitting exactly this. Nothing is broken locally; retry later or switch to a different mirror in /etc/apt/sources.list.
“No new release found” when you expected one
Almost always phased rollout, or a release that has not shipped yet. Check /etc/update-manager/release-upgrades and confirm the target release exists. If it says Prompt or lts, the upgrade manager is waiting for you to start it deliberately.
No network after an update
A well-documented case on the Linux config forums involved a resolv.conf left as a broken symlink after a NetworkManager change, which killed name resolution while the hardware was fine. Check the file, repair it, and reinstall any proprietary wireless driver that the update removed.
The machine will not boot after a kernel update
The previous kernel is still installed; it is just no longer the default. Reboot into GRUB, choose Advanced Options for Ubuntu, and pick the older kernel. r/linux4noobs users stress that recovery mode is for troubleshooting, not a permanent home.
When nothing on disk boots, use a live USB, open a terminal, mount your root partition and chroot into it. One community account of exactly this scenario recovered a machine with no network, no desktop packages and no Wi-Fi this way, without reinstalling, by downloading the missing .deb files on another machine with apt-get install --print-uris and dropping them into /var/cache/apt/archives. dpkg is resilient; a reinstall is almost never the answer.
Stop and restore your backup when a boot loop persists after trying the previous kernel, when your root filesystem is read-only with disk errors, or when the upgrade removed a service you cannot reinstall. Those are the moments where the backup is cheaper than the diagnosis.
Frequently Asked Questions
Will updating Ubuntu delete my files?
No. A package update or a release upgrade never touches the contents of your home directory, and configuration files that a package wants to replace are saved as .dpkg-dist or .dpkg-old rather than overwritten without a prompt. Files disappear when something else deletes them, such as an autoremove run removing application packages, or when you reinstall from a USB stick onto an unformatted disk. That is the argument for keeping one verified backup outside the machine.
Does Ubuntu update automatically?
On desktop installs, yes for security patches. Ubuntu ships with unattended-upgrades enabled and applies security updates quietly in the background, then tells you when a restart is needed. The Software Updater checks for and applies the rest when you open it or approve the notification. Server installs update nothing unless you either run apt yourself or configure unattended-upgrades, which is why so many servers sit unpatched for months.
How long should I wait after a new Ubuntu release before updating?
If you are staying on your current release, days make no difference. If you are moving to a brand-new LTS release, wait for the first point release, the .1 update, before taking production machines across. Ubuntu’s community recommended exactly this for 24.04 when 24.04.1 was delayed over known issues. Phased rollout also means your machine may not be offered the upgrade immediately, which is normal rather than a fault.
Should I use apt upgrade or apt full-upgrade?
Use apt upgrade for routine work. It installs newer versions of packages you already have and stops rather than removing anything to satisfy a dependency. Use apt full-upgrade, also called dist-upgrade, when you actually want packages added and removed, such as moving to a new kernel stack. For a plain server patch cycle, apt update followed by apt upgrade is the pair most administrators run.
How can I update a remote Ubuntu server without locking myself out?
Take a snapshot first, then open two SSH sessions and keep both alive until the reboot is done. Run the upgrade, check service state with systemctl u002du002dfailed, and reboot inside a maintenance window rather than at the end of the command. If a service restart disrupts your connection, the second session gets you back in. Make sure you also have out-of-band console access, because a bad kernel can defeat SSH entirely.
What happens if I turn my computer off during an update?
dpkg runs in transactions, so powering off mid-package leaves some packages unpacked and some not. The system usually still boots, and the fix is short: remove the stale locks, run sudo dpkg u002du002dconfigure -a, then sudo apt-get install -f. The risk climbs sharply during a release upgrade, where hundreds of transactions are in flight. Plug the machine in, let it finish, and reboot only when it tells you to.
Conclusion
Learning how to update Ubuntu safely comes down to a fixed order: identify your release, back up and verify the backup, simulate the upgrade, apply only the standard package updates, move to a new release only through a supported path and only after the first point release, reboot deliberately, then verify the kernel, package state and services. Start today with the two commands that tell you where you stand: lsb_release -a and sudo apt update.