How to set up Pi-hole to block ads on your network comes down to three jobs: install it on a machine that stays switched on, give that machine a fixed local IP address, and change your router’s DNS to point at it. The install takes about 20 minutes. The router change takes two minutes and is the only step that can take your whole household offline.
Pi-hole is free, open-source software that acts as a DNS server for every device on your Wi-Fi. When a phone, TV or laptop asks for an address, Pi-hole checks the domain against a blocklist and returns nothing if it’s an ad server, so the ad never downloads. That covers devices with no browser and no adblocker installed, which is where most household ad blocking falls apart.
I’ve got a couple of hardware notes below that most tutorials skip, plus the recovery path for the moment the machine hosting Pi-hole goes down and every device on your network loses the internet. Read those two parts before you touch the router.
Table of Contents
- 1What You Need
- 2Hardware options
- 3Router access and accounts
- 4What changing DNS can break
- 5Step-by-Step
- 61. Choose the Right Pi-hole Installation Method
- 72. Install Pi-hole and Keep Its IP Address Stable
- 83. Configure Your Router to Use Pi-hole
- 94. Verify Pi-hole Is Blocking Ads on Your Network
- 105. Protect DNS Privacy and Set a Simple Safety Net
- 11Common Mistakes
- 12Frequently Asked Questions
- 13Will Pi-hole block every ad on my network?
- 14Can I install Pi-hole on a Raspberry Pi?
- 15How do I set up Pi-hole to block ads on my network if my router does not allow custom DNS?
- 16Why is YouTube still showing ads after I set up Pi-hole?
- 17Can I use Pi-hole with a VPN or encrypted DNS?
- 18Should I expose the Pi-hole dashboard to the internet?
- 19Conclusion: Start With a DNS Test
What You Need

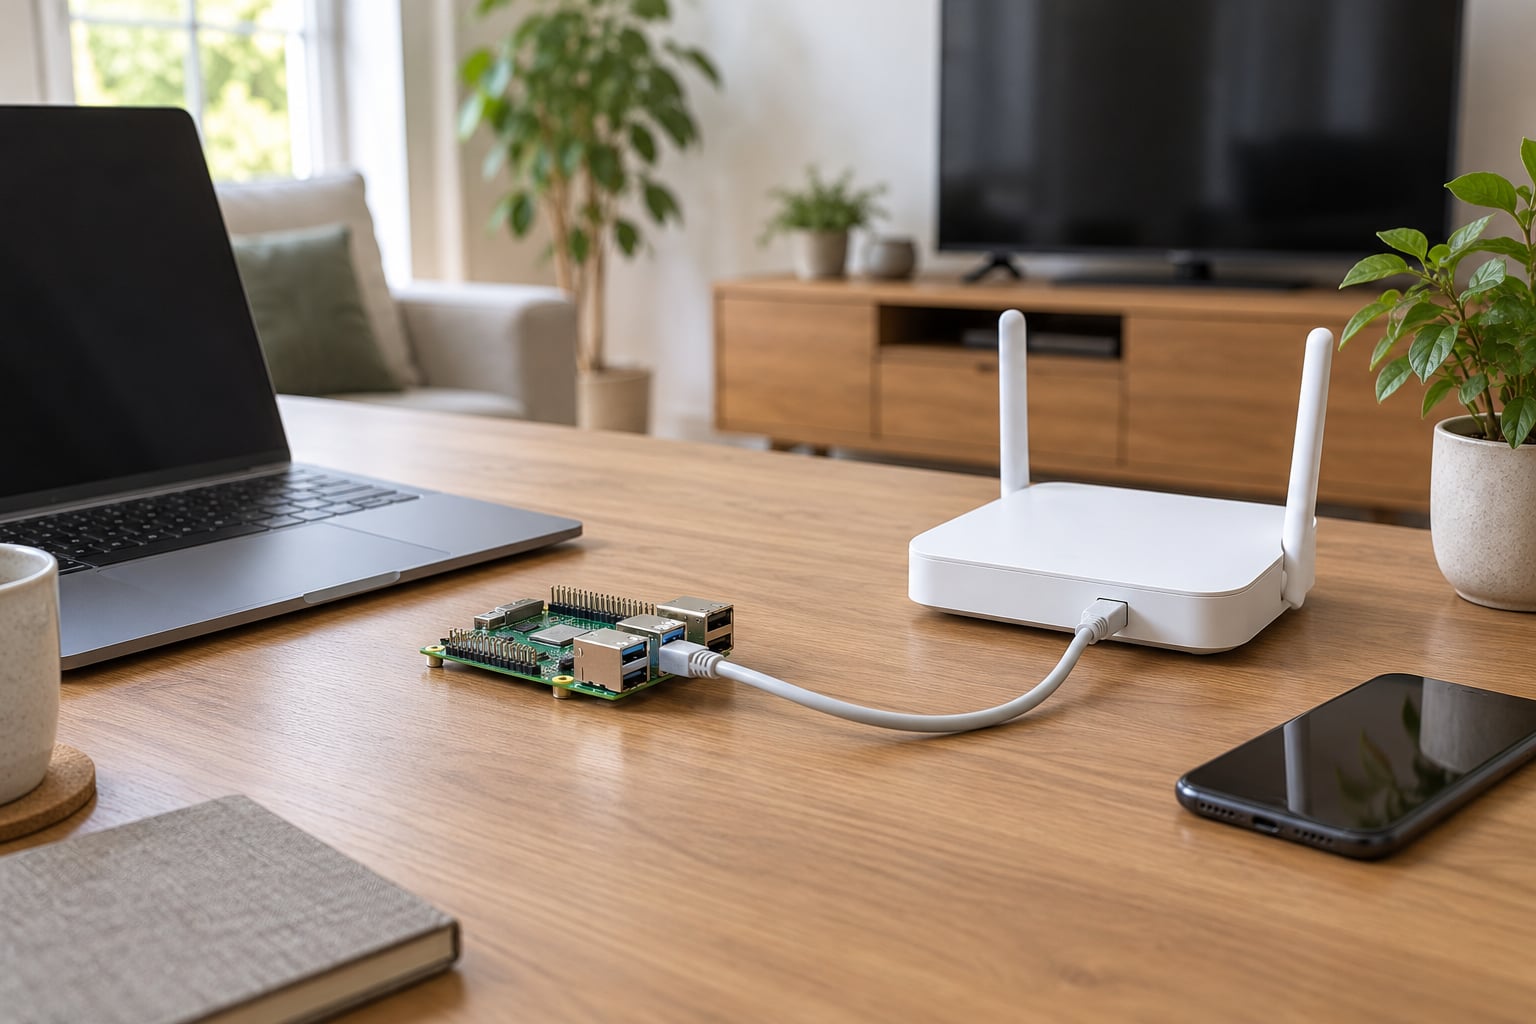
You need three things working before you start: a small always-on machine, admin access to your router’s settings page, and about half an hour.
Hardware options
- A Raspberry Pi. Any current model with an Ethernet port works well, and a Pi Zero 2 W is enough if you connect it over Wi-Fi. Avoid relying on Wi-Fi for the final setup; wired is more reliable.
- A spare x86 PC, mini PC or NAS. Perfect if you have one. More headroom, no SD card to fail.
- An existing Linux host with Docker. This is where a lot of 2026 installs now happen. The official container image is maintained and works with Portainer, Docker Compose or a single command.
- A pre-built appliance. Sold as a ready-to-flash box. Fine if you want zero assembly, and a worse value than hardware you already own.
A microSD card of 8GB or more, a suitable power supply, and an Ethernet cable cover the Raspberry Pi route. If you use an SD card, back up your Pi-hole settings once you have it running, because cards fail without warning.
Router access and accounts
You need the admin login for your router, which is usually printed on a sticker underneath it or in the manual. Most ISP-provided routers in the US let you change the LAN DNS setting, though some firmware hides it behind an advanced menu. You also need an account with your Pi-hole admin interface; the installer prompts you to set a password and asks you not to reuse your router password.
Make sure you know your router’s current DNS value and how to put it back before you change anything. Photograph the page. That single photo is your undo button.
What changing DNS can break
Moving DNS off your ISP’s resolvers affects the whole network, not just ad blocking. Things that commonly need attention afterwards:
- Parental controls and family filtering, which are usually enforced at the ISP DNS level.
- Split-tunnel VPNs that push their own DNS, and corporate VPN clients that reject unknown resolvers.
- Smart TVs, consoles and IoT devices that hardcode a public DNS address and quietly ignore your router.
- Some ISPs and networks block outbound DNS to third-party resolvers entirely, which makes an unreachable Pi-hole look like a broken install.
And the big one: if Pi-hole is your only DNS server and it goes offline, DNS resolution stops for the entire network. Browsers will show “DNS_PROBE_FINISHED” or “Temporary failure in name resolution” on everything. Keep a note of your router’s original DNS values for exactly this reason.
One distinction worth being clear about: everything below installs Pi-hole on your local network. It is not a public DNS service you point strangers at. Pi-hole has no account system, no uptime guarantee and no redundancy, and it is not designed to serve DNS to the internet.
Step-by-Step
1. Choose the Right Pi-hole Installation Method
Pick one of these two routes and follow the matching instructions in step 2. Both end at the same place: a local IP address running Pi-hole’s DNS service.
| Method | Best for | Trade-off |
|---|---|---|
| Pi-hole OS flashed to a Raspberry Pi | Dedicated, always-on filtering | SD card can fail; more setup steps |
| Pi-hole on a spare PC or NAS | Hardware you already own | Uses more power than a Pi |
| Official Docker container | Existing Linux host, Unbound alongside | Port mapping mistakes break DNS quietly |
| Second Pi as a spare | Homes where an outage means no internet | Two installations to maintain |
Whichever you choose, the requirements are the same: wired Ethernet if you can, a static local IP address, enough storage for the image plus logs (2GB RAM and 8GB of storage are comfortable), and a restart policy that brings the service back after a power cut.
2. Install Pi-hole and Keep Its IP Address Stable
Route A, Raspberry Pi or spare PC. Flash Raspberry Pi OS Lite (64-bit) with the Raspberry Pi Imager onto the SD card. On Debian Bookworm the Imager asks whether you want a username and password; set one, because the default pi account is a needless risk on a device that will face the open LAN.
For a headless first boot, add an empty file named ssh to the boot partition so SSH starts automatically. If you’re joining over Wi-Fi rather than Ethernet, add wpa_supplicant.conf in the boot partition with four lines:
country=US
ctrl_interface=DIR=/var/run/wifi GROUP=netdev
update_config=1
network={
	ssid="your-network"
	psk="your-password"
}
Boot the Pi with the card inserted and a monitor and keyboard attached for the first boot. On a fresh Bookworm image the desktop auto-creates a user and offers to enable SSH, and in sudo raspi-config you should confirm Interface Options, SSH, is enabled and Interface Options, I2C is off since Pi-hole doesn’t use it.
Now run the installer and accept the defaults:
curl -sSL https://install.pi-hole.net | bashThe installer pulls pihole-FTL, the component that answers DNS queries, and prints your Pi-hole IP address when it finishes. Check that the service is answering:
pihole statusYou should see a version number, a CPU and memory line, and a domain count. If you get “DNS service is not running”, check the clock and network first, then re-run the installer.
Route B, Docker on an existing Linux host. The quick path is the official one-liner, which pulls the image and starts the container with a web password set at the same time:
docker run --name pihole -p 80:80 -p 443:443 -p 53:53/tcp -p 53:53/udp
  -e TZ=America/New_York -e PIHOLE_WEBPASSWORD='use-a-long-one'
  -v './etc:/etc/pihole' -v './var/www:/var/www/html'
  -v './etc.lighttpd:/etc/lighttpd'
  --restart=unless-stopped
  pihole/pi-hole:latest
Port 53 is the one that matters. If your host already runs something on 53, stop it before starting the container, or the DNS service will fail to bind and you’ll be debugging an empty container log.
Give Pi-hole a stable address. The cleanest way is a DHCP reservation in the router: find the Pi’s current IPv4 address with hostname -I, note the MAC address from ip link, and in your router’s DHCP server settings bind that MAC to the same address. A static address configured inside the OS works too, as long as you stay inside the pool your router hands out.
Confirm the device is reachable from another machine on the LAN:
ping 192.168.1.50Replace that address with yours. Nothing about Pi-hole needs a public IP address or a domain name.
3. Configure Your Router to Use Pi-hole
This is the step that matters. On most routers, find the DNS setting under a LAN, WAN or DHCP server menu. Labels vary by model, so look for “Custom DNS”, “DNS server” or “DHCP server” rather than one exact path.
- TP-Link Deco and many Archer models: Advanced, then Network, then LAN/WAN DHCP Server, where a Custom DNS field appears.
- Netgear: Advanced, Setup, Internet Setup, and the DNS server entry.
- ASUS routers: Advanced, WAN, Internet, then DNS Server.
- Some ISP gateways: a Basic or Network section with a DNS server dropdown that only appears once you disconnect the ISP’s automatic DNS.
Enter the Pi-hole IP as the only custom DNS server, clear any second field, and save. Then restart the router so clients pick up the new DHCP lease. Leaving your ISP’s DNS address in a secondary field is the single most-cited configuration mistake in Pi-hole communities: clients pick whichever server answers first, and if that’s the ISP, Pi-hole never sees the query at all. Some routers require the two fields to hold the same address, others reject it. Read your router’s help page; if it insists on a second entry, repeat the Pi-hole IP or leave it blank.
You can also let Pi-hole run DHCP instead of the router. Go to Settings, DHCP server in the admin interface, enable the DHCP server, and leave DHCP disabled on the router so only one server is assigning addresses. This is a slightly larger change, and the failure mode is worse: a Pi-hole crash then leaves nothing assigning addresses at all. Most people are better off keeping DHCP on the router.
If you cannot reach the admin page over your LAN, open http://YOURPIHOLEIP/admin from a device that got a lease after the change. Don’t publish port 80 or 443 to the internet, and don’t set up a port forward for the admin interface; there is no reason for it to be reachable from outside.
4. Verify Pi-hole Is Blocking Ads on Your Network
Open /admin on any device. The dashboard tells you how long Pi-hole has been running and what percentage of queries were blocked. A fresh install sitting at 0% is normal for a few minutes; it is not normal after you’ve browsed for a while.
Check the Query Log next. It lists every lookup as it happens, with the client IP and whether it was forwarded or blocked. If the list stays empty while you browse, your device is not using Pi-hole at all. Look for a REGEX row for a domain you know is blocked, or a row marked blocked for a known ad domain, and that confirms the full chain works.
Pi-hole ships with a test page at /admin/test you can use to confirm the block list is being applied.
| Pi-hole usually blocks | Pi-hole cannot block |
|---|---|
| Banner ads from known ad networks | YouTube and Facebook in-feed ads, served from the same domain as the content |
| Ad domains in mobile apps | Ads served from the publisher’s own domain, like sponsored posts marked in-feed |
| Ad scripts on smart TVs and consoles | Ads inside an app that uses its own encrypted DNS |
| Telemetry and tracking domains in the blocklist | Anything a device hardcodes or resolves outside your LAN |
Realistic expectations help here. Roughly 15% to 25% of queries blocked on a normal browsing day is ordinary, and dropping below that usually means a blocklist changed or your traffic did.
The common failure is one device that stays unfiltered. Modern browsers and phones ship with encrypted DNS that bypasses your network resolver. On a desktop, check that Secure DNS or TRR is set to off or automatic in Firefox and Chrome. On Android, Private DNS in the network settings is often set to a specific host name, which sends every lookup straight past Pi-hole. Set it to Automatic or Off, or add those domains to your blocklist and accept that you’re filtering by domain rather than by resolver.
5. Protect DNS Privacy and Set a Simple Safety Net
Pi-hole doesn’t hide your browsing by itself. It still forwards every allowed lookup to an upstream DNS provider, and that provider can see all the domains your household resolves. Choosing an upstream provider with its own privacy policy, or running a local Unbound recursive resolver inside the container or alongside it, removes that third party from the path. Unbound also stops your ISP from redirecting or interfering with lookups.
On the admin interface, keep the default blocklist plus one maintained list from firebog.net. Add and remove lists under Settings, Adlists. More lists means a higher blocked percentage and a slightly higher chance of breaking a login or a store checkout, so add them one at a time.
Set a sensible query log policy in Settings, Privacy. Keeping logs for a day or two makes troubleshooting possible; keeping them forever tells you more than you need. Set the web admin password to something long, and consider turning off the admin interface entirely in Settings, Interface once your setup is stable.
Back up now, while it works. Settings, Teleporter, Backup lets you download a copy of your DNS configuration, adlists, groups and settings as a single file. If the machine dies, a fresh install plus an import restores your blocklists in a minute instead of an hour.
Write down three things in plain text: the Pi-hole IP address, your router’s original DNS values, and how to physically reach the machine. If the host goes down, set your router’s DNS back to the ISP values or a public resolver, and everything on the network comes back while you fix it.
Common Mistakes
Work through these in order and check service status before any reset. Most problems are a routing or reachability issue, not a broken Pi-hole.
Dashboard unreachable. Confirm the machine is powered on and can be pinged, that you’re on the same LAN, and that you’re typing the IP and /admin over http, not https. If the container route is in use, check that the port 80 mapping exists and that nothing else on the host already holds port 53.
Nothing is blocked anywhere and the Query Log is empty. Your clients aren’t using Pi-hole. Check the router DNS field for a leftover ISP entry, then check per-device overrides, which quietly override router settings on Windows, macOS, Android and most smart TVs.
Dashboard works, blocked percentage stuck at 0%. The Query Log tells you which. If entries show forwarded rather than blocked, the adlist probably hasn’t loaded: check Settings, Adlists and confirm each list shows green. If entries appear for a device that clearly browses on other machines, that device has its own DNS or encrypted DNS enabled.
Everything offline, “Temporary failure in name resolution” or DNS_PROBE_FINISHED. Pi-hole isn’t answering. Run pihole status locally, then sudo systemctl status pihole-FTL. On the Docker route use docker logs pihole and check port bindings. A full SD card and a wrong clock after a power cut are the two usual causes. As an immediate recovery, put your router’s DNS back to the ISP values.
The whole LAN lost internet when you enabled Pi-hole. Same cause as above, seen at the moment of the change. Revert the router DNS, confirm the internet is back, then diagnose Pi-hole properly before trying again.
Some pages load, others hang. A single over-aggressive blocklist is the usual cause. Look for a domain in the Query Log that was blocked, allowlist it, and see if the page loads. Empty REGEX blocks in the log point to the same thing.
Router DNS reverts after the lease renews or a reboot. Some ISP firmware reapplies automatic DNS on reconnect. Re-enter the setting, and if it keeps happening, run DHCP in Pi-hole instead so clients receive the Pi-hole address from the DHCP server itself.
One device still shows ads. Smart TVs, consoles and phones usually hardcode a resolver. Disable private or secure DNS on that device, and expect partial coverage where you can’t.
IPv6-related failures. If clients get IPv6 addresses but your Pi-hole only has an IPv4 address, those clients bypass it or fail to resolve. Either assign Pi-hole an IPv6 address too, or disable IPv6 DHCP on the router so clients use IPv4 only.
Frequently Asked Questions
Will Pi-hole block every ad on my network?
No. Pi-hole filters by domain, so it stops banner ads, ad scripts and tracking domains from known lists, on every device that uses your network DNS. It cannot stop ads served from the same domain as the content, which is most YouTube and Facebook in-feed advertising, and it cannot stop a device that hardcodes its own resolver or uses built-in encrypted DNS. Expect most of what you see in a browser to disappear, not all of it.
Can I install Pi-hole on a Raspberry Pi?
Yes, and that is the most common setup. Flash Raspberry Pi OS Lite with the Raspberry Pi Imager, connect it over Ethernet, reserve a static address in your router, then run the Pi-hole installer. A Pi Zero 2 W is enough if you accept Wi-Fi, which is less reliable. Give the card a backup of your settings, because SD cards fail and take the network’s DNS with them.
How do I set up Pi-hole to block ads on my network if my router does not allow custom DNS?
Set DNS on the devices themselves instead. On Windows, macOS, Android and iOS, enter your Pi-hole IP as the only DNS server in the network adapter or Wi-Fi settings. The drawback is coverage: anything that does not get configured, including most smart TVs and consoles, will keep using your ISP’s DNS. A managed switch or a router that does allow custom LAN DNS is the cleaner fix for a whole household.
Why is YouTube still showing ads after I set up Pi-hole?
YouTube serves most of its ads from googlevideo.com and youtube.com, the same domains as the video itself, so there is no separate ad lookup for Pi-hole to block. Blocking the whole domain breaks playback. For video ads you need a browser or client-side blocker such as uBlock Origin on devices that have one, used alongside Pi-hole rather than instead of it.
Can I use Pi-hole with a VPN or encrypted DNS?
Yes, but the resolver depends on the tunnel. A full-tunnel VPN usually sends your DNS to the VPN provider, so Pi-hole stops seeing queries. Disable the VPN’s DNS handling or point the VPN client at your Pi-hole IP. Split-tunnel setups vary by client. Encrypted DNS in browsers and Android Private DNS bypasses Pi-hole by design, so turn those off per device if you want network-wide filtering.
Should I expose the Pi-hole dashboard to the internet?
No. The admin interface shows your browsing history and lets anyone who reaches it reconfigure DNS, so keep it on the LAN behind its password. Do not port-forward 80, 443 or the DNS port, and do not put the host behind a public IP tunnel for convenience. If you need access away from home, reach it over a VPN or an SSH tunnel instead.
Conclusion: Start With a DNS Test
Take these four in order and stop at the first failure: install Pi-hole on an always-on machine, reserve a stable local IP for it, point your router’s single DNS field at that IP, and confirm queries appear in the Query Log before touching blocklists.
Keep the router’s original DNS values written down somewhere you will find them at 9pm when nothing loads. Some devices, mostly phones and smart TVs, will need their own encrypted DNS turned off or a client-side blocker added, and a full-tunnel VPN will take DNS away from Pi-hole entirely. Everything else you can handle from the router page.