Installing a LAMP stack on Ubuntu takes one apt command per component and about 20 to 40 minutes. You update the system, install Apache, add MySQL or MariaDB, install PHP with its Apache module, then verify each layer with a real test page before you trust it.
This guide targets the current Ubuntu LTS releases. Ubuntu 24.04 LTS ships PHP 8.3 by default, 22.04 LTS ships PHP 8.1, and the commands differ slightly in the package names they need. I flag every version-specific difference as you go.
Table of Contents
- 1What You Need
- 2How to Install a LAMP Stack on Ubuntu: Step-by-Step
- 31. Update Ubuntu and Confirm Your Privileges
- 42. How to Install a LAMP Stack on Ubuntu with Apache
- 53. Install and Secure MySQL or MariaDB
- 64. Install PHP and the Apache PHP Module
- 75. Configure a Test PHP File and Database Connection
- 86. Configure the Firewall Without Locking Yourself Out
- 97. Test the Complete LAMP Stack
- 10Common Mistakes
- 11Frequently Asked Questions
- 12Which Ubuntu version should I use to install a LAMP stack?
- 13Should I install MySQL or MariaDB on Ubuntu?
- 14Do I need sudo to install Apache, MySQL, and PHP?
- 15How do I check whether the LAMP stack is working?
- 16Can I run a LAMP server on Ubuntu behind a home router?
- 17Conclusion
What You Need
You need a machine running a supported Ubuntu LTS release. Both 22.04 LTS and 24.04 LTS work fine with this walkthrough; 20.04 LTS reaches end of standard support soon, so pick one of the two newer releases if you can.
On sizing, 1 GB of RAM and 5 GB of free disk is enough for a development server with light traffic. Anything heavier wants 2 GB or more, because MySQL and PHP both hold memory they do not return promptly.
- A user account with sudo capability. Installing packages writes to system directories, and that needs root.
- A working internet connection so apt can reach the Ubuntu archive mirrors.
- A terminal and a plain text editor. nano ships with Ubuntu and is enough.
- A public IP address and correctly forwarded ports, but only if the server has to be reachable from the internet.
For a desktop install, skip the IP and router talk entirely and test on localhost. For a VPS, everything you do here works the same way; your provider has already assigned the public IP and opened the firewall above your instance.
Have a real text editor available before you start. You will write an Apache virtual host file and a PHP test script, and both need exact file paths.
How to Install a LAMP Stack on Ubuntu: Step-by-Step
LAMP stands for Linux, Apache, MySQL and PHP. Linux is the operating system you are already on. Apache is the web server that receives HTTP requests and serves files from a document root directory at /var/www/html. MySQL is the relational database that stores persistent data. PHP is the server-side scripting language that generates dynamic pages by reading that data and rendering HTML.
A single page request travels through all four layers: Apache accepts it, hands it to PHP, PHP queries MySQL, and the finished HTML goes back to the browser. Each layer can fail on its own, which is exactly why this guide verifies them separately.
1. Update Ubuntu and Confirm Your Privileges
Refresh the package index and apply pending updates before installing anything new.
sudo apt update
sudo apt upgrade -y
lsb_release -a
sudo -v
lsb_release -a prints the release codename and version number. If it reports 24.04 you get PHP 8.3 by default; on 22.04 you get PHP 8.1. Reading that line now saves you guessing later.
sudo -v refreshes your sudo timestamp and asks for your password once. If the command is not found, you are not root and no install command further down will work.
You know this step worked when apt update prints a summary of package lists read or updated with no errors in the last few lines.
2. How to Install a LAMP Stack on Ubuntu with Apache
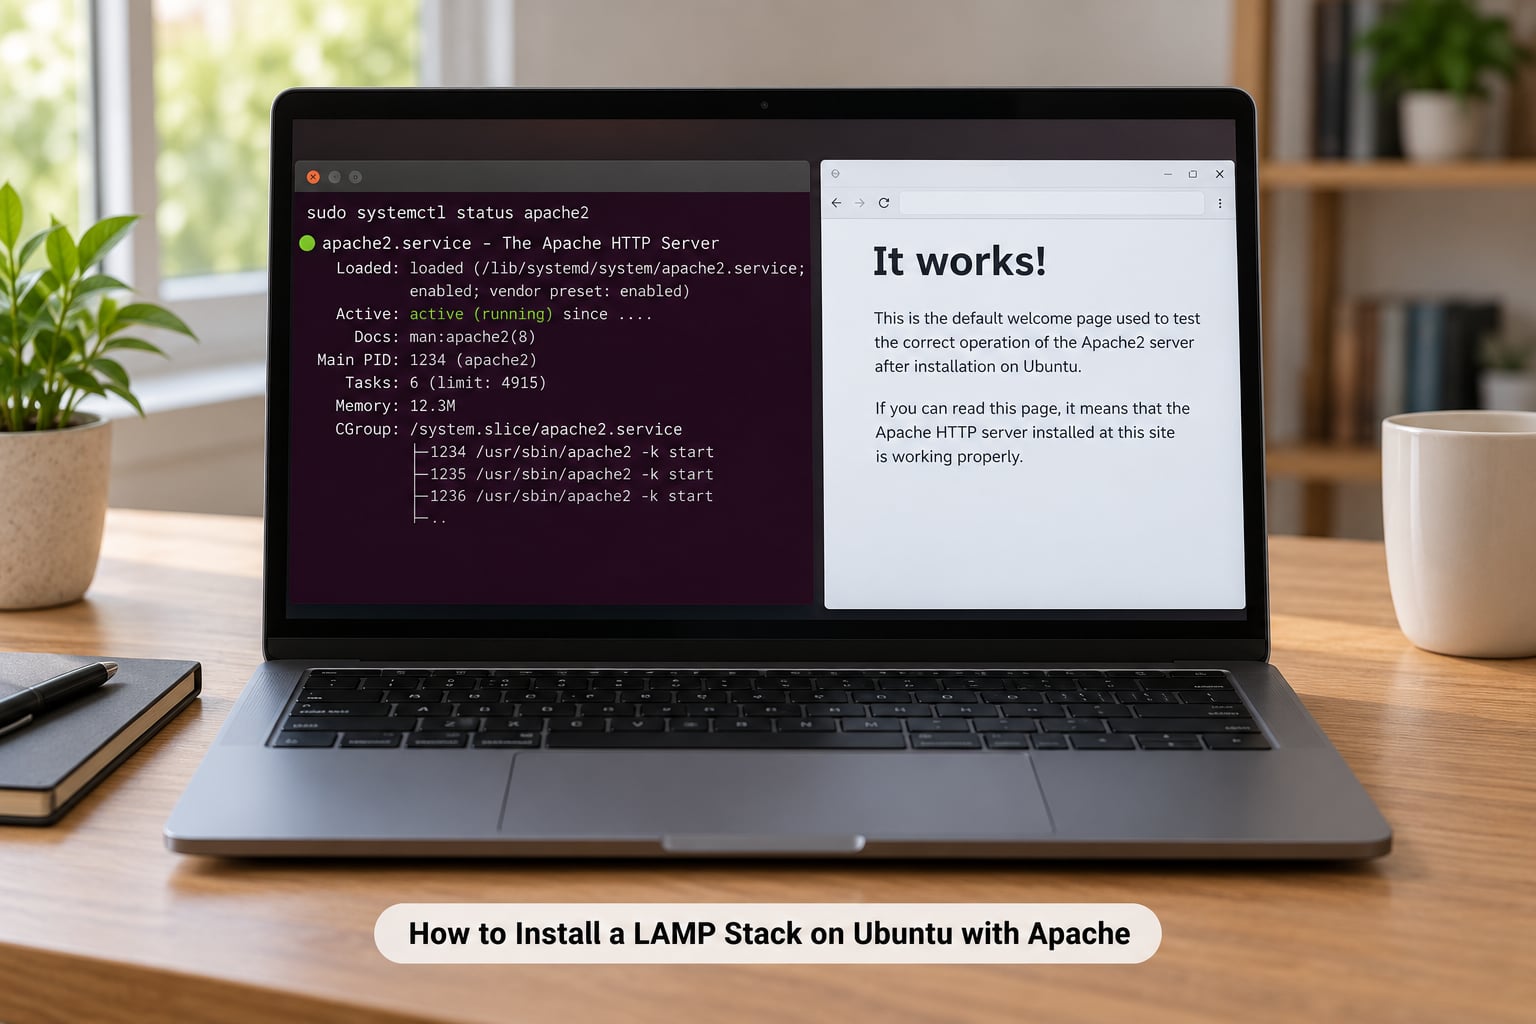
Install the Apache web server, then confirm the service is running and enabled at boot.
sudo apt install apache2 -y
sudo systemctl enable apache2
sudo systemctl start apache2
systemctl status apache2 --no-pager
sudo apache2ctl configtest
On 24.04 LTS the default version is Apache 2.4. The Ubuntu package starts the service automatically, but running the enable and start commands yourself makes the state explicit and survives a later package change.
A healthy systemctl status apache2 shows active: (running) in green. apache2ctl configtest should print Syntax OK.
Open a browser on that machine and visit http://localhost. The default page reads “It works!” with an Apache logo. You can also test from another terminal with curl -I http://localhost, which should return HTTP/1.1 200 OK.
If localhost fails, work through the layers in order rather than reinstalling. First run apache2ctl configtest to rule out a broken configuration file. If that says Syntax OK, check whether the firewall is blocking port 80 with sudo ufw status. If the firewall is open and the port is free, the remaining suspect is port forwarding or DNS, which only applies to a public server.
3. Install and Secure MySQL or MariaDB
Ubuntu offers two choices here, and both are legitimate. MySQL Server is the Oracle-maintained version and is the literal letter in LAMP. MariaDB is a drop-in fork that some distributions and smaller hosting providers default to.
sudo apt install mysql-server -y
sudo systemctl enable mysql
sudo systemctl start mysql
systemctl status mysql --no-pager
sudo mysql_secure_installation
To use MariaDB instead, run sudo apt install mariadb-server -y and secure it with sudo mariadb-secure-installation. The service name changes from mysql to mariadb, and that difference is the single most common cause of a “no such service” error.
The secure installation script asks five questions. Here is what each answer does rather than a list of yeses.
- Press Enter for the root password if you use socket authentication, or set a password if you want one for root.
- Answer Y to remove the anonymous user accounts, which exist so a failed login cannot be distinguished from a bad username.
- Answer Y to disallow remote root logins. Root should work locally through the socket.
- Answer Y to remove the test database called test.
- Answer Y to refresh the privilege tables so the changes take effect.
On Ubuntu the root account normally authenticates through a local unix socket, which means sudo mysql logs you straight in with no password. That is intentional and safe while the database listens only on localhost, which is the default.
You know this step worked when systemctl status mysql reports active and sudo mysql -e "SELECT VERSION();" prints a version number.
4. Install PHP and the Apache PHP Module
Install PHP, the Apache module that runs it inside the web server process, and the MySQL extension PHP needs to talk to the database.
sudo apt install php libapache2-mod-php php-mysql -y
sudo a2enmod php
sudo systemctl restart apache2
php -v
On 24.04 LTS this gives you PHP 8.3, on 22.04 LTS you get PHP 8.1. If you need a specific version, the package name changes accordingly, for example php8.1, and the old style names like php5-mysql simply do not exist on modern releases.
This guide uses libapache2-mod-php rather than PHP-FPM because it is one moving part instead of three. The module runs inside Apache, so there is no separate service to start and no pool to keep in sync. PHP-FPM plus a FastCGI or nginx front end makes more sense under real concurrent load, and it is the right choice for most production setups.
Verify it with php -v for the CLI version and php -m | grep mysql to confirm the database extension loaded. Restarting Apache after enabling the module is what makes it take effect.
5. Configure a Test PHP File and Database Connection
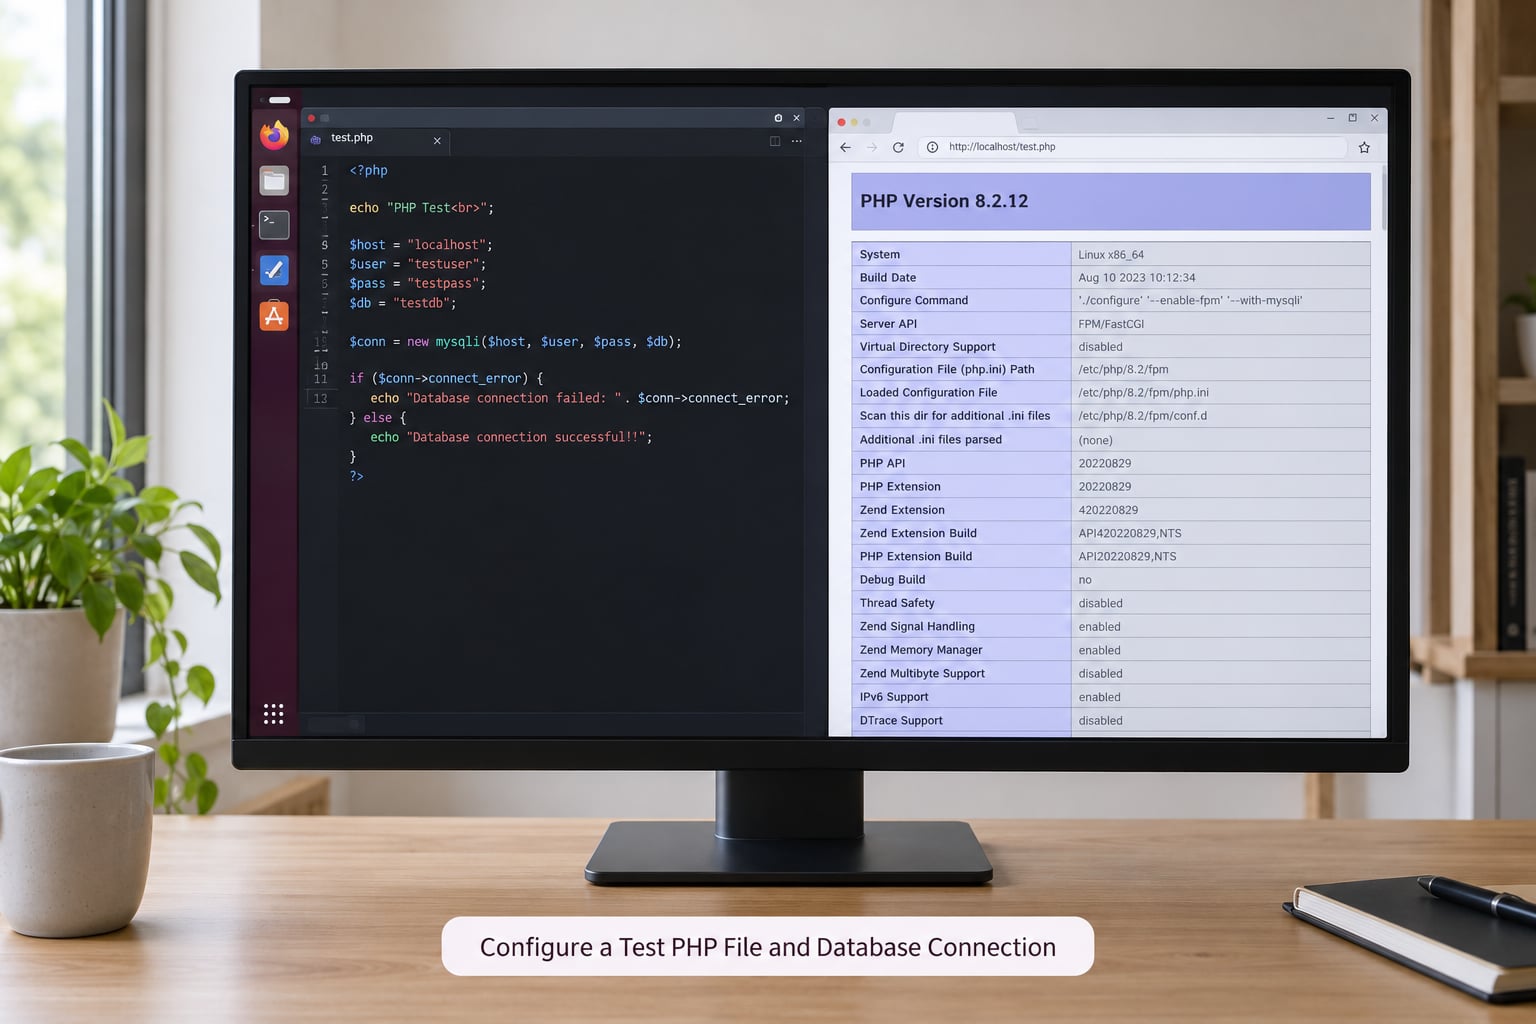
Create a temporary file in the document root that prints PHP’s configuration.
echo '<?php phpinfo(); ?>' | sudo tee /var/www/html/info.php
sudo chown www-data:www-data /var/www/html/info.php
curl http://localhost/info.php | head -20
Open http://localhost/info.php in a browser. You should see the PHP information page with a table of loaded modules. If you see the literal text <?php on the page, Apache is serving the file as plain text, and the fix is in the Common Mistakes section below.
Remove that file as soon as you have read it. It exposes your file paths, loaded modules and environment settings to anyone who reaches the server.
sudo rm /var/www/html/info.php
Next, create a database and a dedicated user for your application rather than connecting as root. Least privilege means the application account can only touch its own database.
sudo mysql
CREATE DATABASE appdb CHARACTER SET utf8mb4 COLLATE utf8mb4_unicode_ci;
CREATE USER 'appuser'@'localhost' IDENTIFIED BY 'a-strong-password';
GRANT ALL PRIVILEGES ON appdb.* TO 'appuser'@'localhost';
FLUSH PRIVILEGES;
EXIT;
Test that connection from PHP with a short script rather than assuming it works.
<?php
try {
  $pdo = new PDO('mysql:host=localhost;dbname=appdb', 'appuser', 'a-strong-password');
  echo "Database connection OK";
} catch (PDOException $e) {
  echo "Connection failed: " . $e->getMessage();
}
Save it as /var/www/html/dbtest.php, load it in a browser, and then delete it. A successful run prints Database connection OK.
6. Configure the Firewall Without Locking Yourself Out
Allow SSH before you enable the firewall, every single time. If you enable UFW without an SSH rule, your existing session survives but no new session can connect, and on a VPS that means a console login to recover.
sudo ufw status
sudo ufw allow OpenSSH
sudo ufw allow 'Apache Full'
sudo ufw enable
sudo ufw status verbose
OpenSSH keeps port 22 reachable. Apache Full opens ports 80 and 443. On a local development machine you can stop there.
For a public site, add the certificate tool before enabling the firewall so you never open 443 later:
sudo apt install certbot python3-certbot-apache -y
Confirm with sudo ufw status verbose. You want to see OpenSSH, Apache Full and Status: active. Before you walk away from a remote server, open a second terminal and confirm you can start a new SSH session from it.
7. Test the Complete LAMP Stack
Run through this list once and every layer is accounted for.
sudo apt updatecompletes without errors.systemctl is-active apache2 mysqlprints active twice.systemctl is-enabled apache2 mysqlprints enabled twice, meaning both start after a reboot.apache2ctl configtestprints Syntax OK.php -vreports the expected version for your Ubuntu release.sudo mysql -e "SHOW DATABASES;"lists appdb.sudo ufw statusshows OpenSSH and Apache Full.http://localhostserves the Apache default page.
Test locally first, then by IP. Running curl -I http://localhost on the server proves the software works. Opening the same address from a second machine proves the network path works. When localhost responds and the IP address times out, the fault is in the firewall, the router, or missing port forwarding, not in LAMP.
Confirm persistence with a restart when you are not working through an SSH session:
sudo reboot
After it comes back, run systemctl is-active apache2 mysql again. Two actives means your stack survives a reboot, which is the actual test of whether it is set up correctly.
For a copy-and-paste rebuild, the whole sequence in order:
sudo apt update && sudo apt upgrade -y
sudo apt install apache2 mysql-server php libapache2-mod-php php-mysql -y
sudo systemctl enable apache2 mysql
sudo systemctl restart apache2
sudo mysql_secure_installation
sudo ufw allow OpenSSH
sudo ufw allow 'Apache Full'
sudo ufw enable
Common Mistakes
| Symptom | Cause | Fix |
|---|---|---|
| 403 Forbidden in the browser | File or parent directory is not readable by the web server user | sudo chown -R www-data:www-data /var/www/html and sudo chmod -R 755 /var/www/html |
| Browser downloads the PHP file instead of running it | The PHP module is disabled or Apache was not restarted after installing it | sudo a2enmod php then sudo systemctl restart apache2 |
| Page is not the one you edited | The site is serving a different DocumentRoot, often a virtual host | Check the active site with sudo apache2ctl -S and edit the matching file in /etc/apache2/sites-enabled |
| Access denied for user root | Trying to log in over TCP with a socket-only root account | Use sudo mysql locally, or create a dedicated user with a password |
| Unable to start mysql.service, unit not found | Service name differs between MySQL and MariaDB, or across releases | Check with systemctl list-units --type=service | grep -E 'mysql|maria' and use the name printed there |
| Address already in use on port 80 | Another web server or process holds the port | sudo ss -ltnp | grep :80, then stop the other process or change the listening port |
| Permission denied on a package install | Commands run without sudo, or the account is not in the sudo group | Prefix with sudo; confirm the account belongs to the sudo group |
| SSH connection refused after firewall changes | UFW enabled without an OpenSSH rule | Use your provider’s console, then sudo ufw allow OpenSSH and sudo ufw reload |
| Works on localhost, times out from another machine | Firewall, router NAT, or the VM network mode is blocking traffic | Allow the port in UFW, forward it on the router, and set the VM network to bridged or a host-only adapter with port forwarding |
| Package php5-mysql or similar not found | The package name changed in a newer Ubuntu release | Use php-mysql, then confirm with php -m | grep mysql |
After that, a few hardening habits keep a new server boring in the best way. Delete test pages the day you create them. Keep the database bound to localhost and never open port 3306 to the world.
Turn off version disclosure so scanners learn nothing about your patch level. Add ServerTokens Prod and ServerSignature Off to /etc/apache2/conf-available/security.conf, then reload Apache. In /etc/php/8.3/apache2/php.ini on 24.04, set expose_php = Off.
Enable mod_rewrite if your application needs clean URLs, with sudo a2enmod rewrite and a restart. Run sudo apt upgrade on a regular schedule, since most Linux compromises come from unpatched packages rather than clever attacks.
Frequently Asked Questions
Which Ubuntu version should I use to install a LAMP stack?
Use the newest LTS release your provider supports, which means Ubuntu 24.04 LTS today. It ships PHP 8.3 and MySQL 8.0, and receives security updates for years rather than months. Ubuntu 22.04 LTS still works well with PHP 8.1 if you need it for older applications. Avoid non-LTS releases on any server, since they are not maintained for security once the next release ships.
Should I install MySQL or MariaDB on Ubuntu?
Either is fine for most workloads. MariaDB is the default on several Linux distributions, offers a broader package set, and is broadly compatible with MySQL. MySQL Server is what the L in LAMP refers to and is required if your application vendor officially tests against MySQL. Check your application’s stated requirement, then pick one and stay with it.
Do I need sudo to install Apache, MySQL, and PHP?
Yes. Package installation writes to system directories owned by root, so every apt install command needs sudo. Running the server afterward does not. Apache, MySQL and PHP each run as their own unprivileged service account, usually www-data or mysql, which is part of why the setup is reasonably safe out of the box. Only the installation and configuration commands need elevated privileges.
How do I check whether the LAMP stack is working?
Check each layer separately. Run systemctl is-active apache2 and systemctl is-active mysql for services, php -v for PHP, and load http://localhost in a browser for the Apache default page. The real proof is PHP talking to the database, so create a short PDO script in /var/www/html and confirm it connects. Delete both test files once they pass.
Can I run a LAMP server on Ubuntu behind a home router?
Yes, with extra steps. A small VPS is simpler because your provider assigns a public IP and manages the firewall. At home you need a port forward from your router to the server’s local IP for ports 80 and 443, a firewall rule allowing them, and either a static IP or dynamic DNS. Many residential ISPs block inbound port 80, which is why a tunnel or VPS is often easier.
Conclusion
Start by updating the package index, then install Apache and confirm the default page loads at localhost. From there it is one layer at a time: MySQL or MariaDB with a secure installation run, PHP with libapache2-mod-php, a test file that proves both work together, and a firewall that permits SSH and HTTP without cutting you off.
Knowing how to install a LAMP stack on Ubuntu is the base skill behind WordPress sites, custom PHP applications and internal dashboards, and the same commands move straight to a VPS. Before you deploy anything real, delete the PHP test pages, keep the database reachable only from localhost, confirm both services are enabled so they survive a reboot, and set up a schedule for security updates.