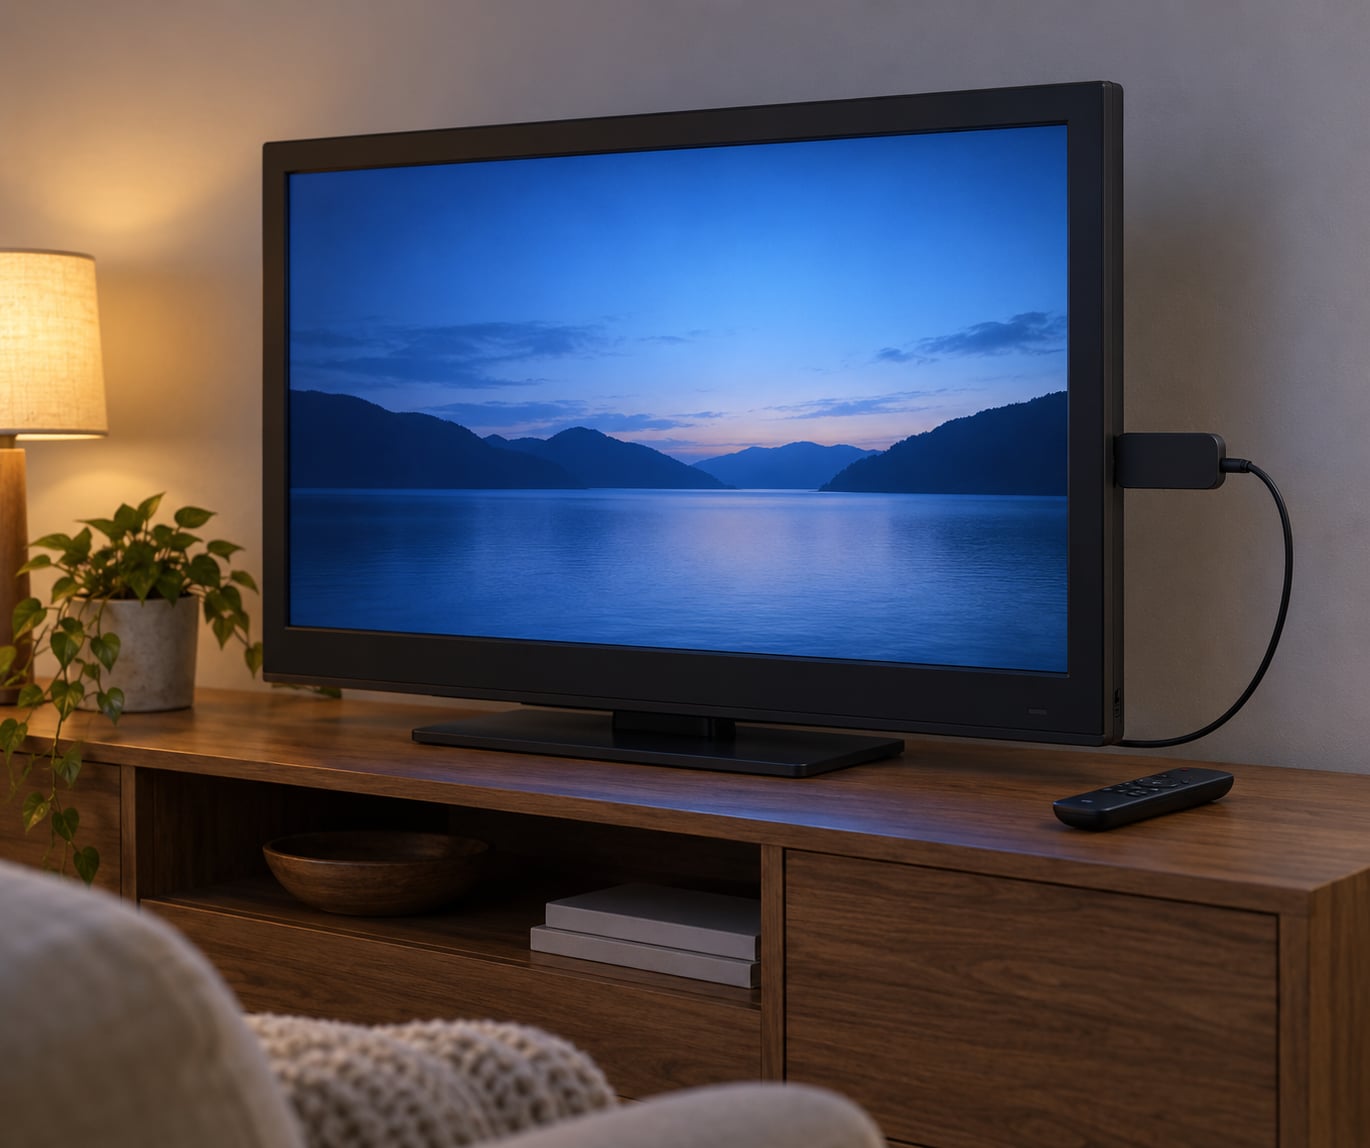
Yes, you can make an old TV smart without buying a new TV. If your set has an HDMI port, plug in a streaming stick, join it to your Wi-Fi, and sign in — that little device runs the apps, and your TV becomes the screen. The whole job takes about 15 minutes and costs less than a single month of a streaming subscription.
There are six ways to do it, cheapest first:
- Free: mirror or cast from your phone, or plug a laptop or desktop PC into the TV over HDMI.
- Free: reuse a game console or Blu-ray player you already own as the streaming box.
- Low cost: a streaming stick from Roku, Amazon, Google or Apple — the most common route by far.
- Low cost: a set-top box from your cable or satellite provider, already in many homes.
- Mid cost: an Android TV box or media player with more storage, Ethernet and Bluetooth.
- Advanced: a USB drive or a small computer running Kodi or LibreELEC for local media libraries.
The list is ordered by what comes out of your pocket because the zero-cost routes are genuinely good, not just a fallback. Anyone who has set up a new TV has probably already worked out that the cheapest streaming box in the house is often the console sitting under it right now.
Table of Contents
- 1What You Need
- 2The required item
- 3Optional but useful
- 4What your old TV needs to be compatible
- 5How long it takes and how hard it is
- 6Step-by-Step: How to Make an Old TV Smart Without a New TV
- 71. Check the inputs on your old TV
- 82. Choose the right streaming device
- 93. Connect the device to the television
- 104. Complete the setup and sign in
- 115. Test apps, casting, and advanced features
- 12Common Mistakes and How to Fix Them
- 13Frequently Asked Questions
- 14Can you really turn an old TV into a smart TV?
- 15What is the cheapest way to turn my non-smart TV into a smart TV?
- 16Will a Firestick turn a TV into a smart TV?
- 17Can you use Chromecast on an old TV?
- 18Can you connect a streaming stick to a TV with no HDMI?
- 19Can I get live TV on a streaming device?
- 20Conclusion
What You Need
The one thing that matters is an HDMI port. That single socket carries both picture and sound, and it is what every modern streaming device expects. Without it you have options, but they all involve a converter and a quality penalty.
The required item
A streaming stick or streaming box with an HDMI output and its own remote. That is the whole shopping list. The stick plugs into the TV, draws power from a small USB adapter or the TV’s own USB port, and connects to Wi-Fi on its own.
Optional but useful
- An HDMI cable — most sticks include one, and you will need a spare for a laptop or PC.
- An Ethernet cable — if the stick has an Ethernet port and the Wi-Fi in your room is patchy.
- An HDMI switch — cheap and useful when a console, a stick and a Blu-ray player all want the same port.
- A USB-C to HDMI adapter — for a laptop with only USB-C or Thunderbolt ports.
- A soundbar — connected through the TV’s HDMI ARC port, which sends audio back from the TV to the bar.
What your old TV needs to be compatible
Any TV built after the mid-2000s with at least one HDMI port works with every mainstream streaming device. There is no brand lock-in. If your set has a yellow, red and white cluster, it likely predates HDMI, and if it has a blue, green and red cluster you have component video, which can be adapted but at reduced quality.
Check the port position before you buy. On many older flat-panels the HDMI socket sits in a recessed well at the back, and a wide dongle physically will not fit — a short HDMI extender cable is the fix. This trips up more people than the money question ever does.
Also check the native resolution before you spend on a 4K device. Open your TV’s menu and look for Display, Picture or Specs, where the resolution is usually listed. A 720p panel will happily accept a 4K signal and then downscale it, so you would be paying for picture quality the screen cannot show.
How long it takes and how hard it is
About 10 to 15 minutes for most people, including software updates and typing your streaming account password with the on-screen keyboard. No tools, no wiring beyond one cable, and if the setup fights back you can unplug it and try another input. The only fiddly part is signing in, since typing a password with a remote takes longer than typing it on a phone.
Step-by-Step: How to Make an Old TV Smart Without a New TV
1. Check the inputs on your old TV
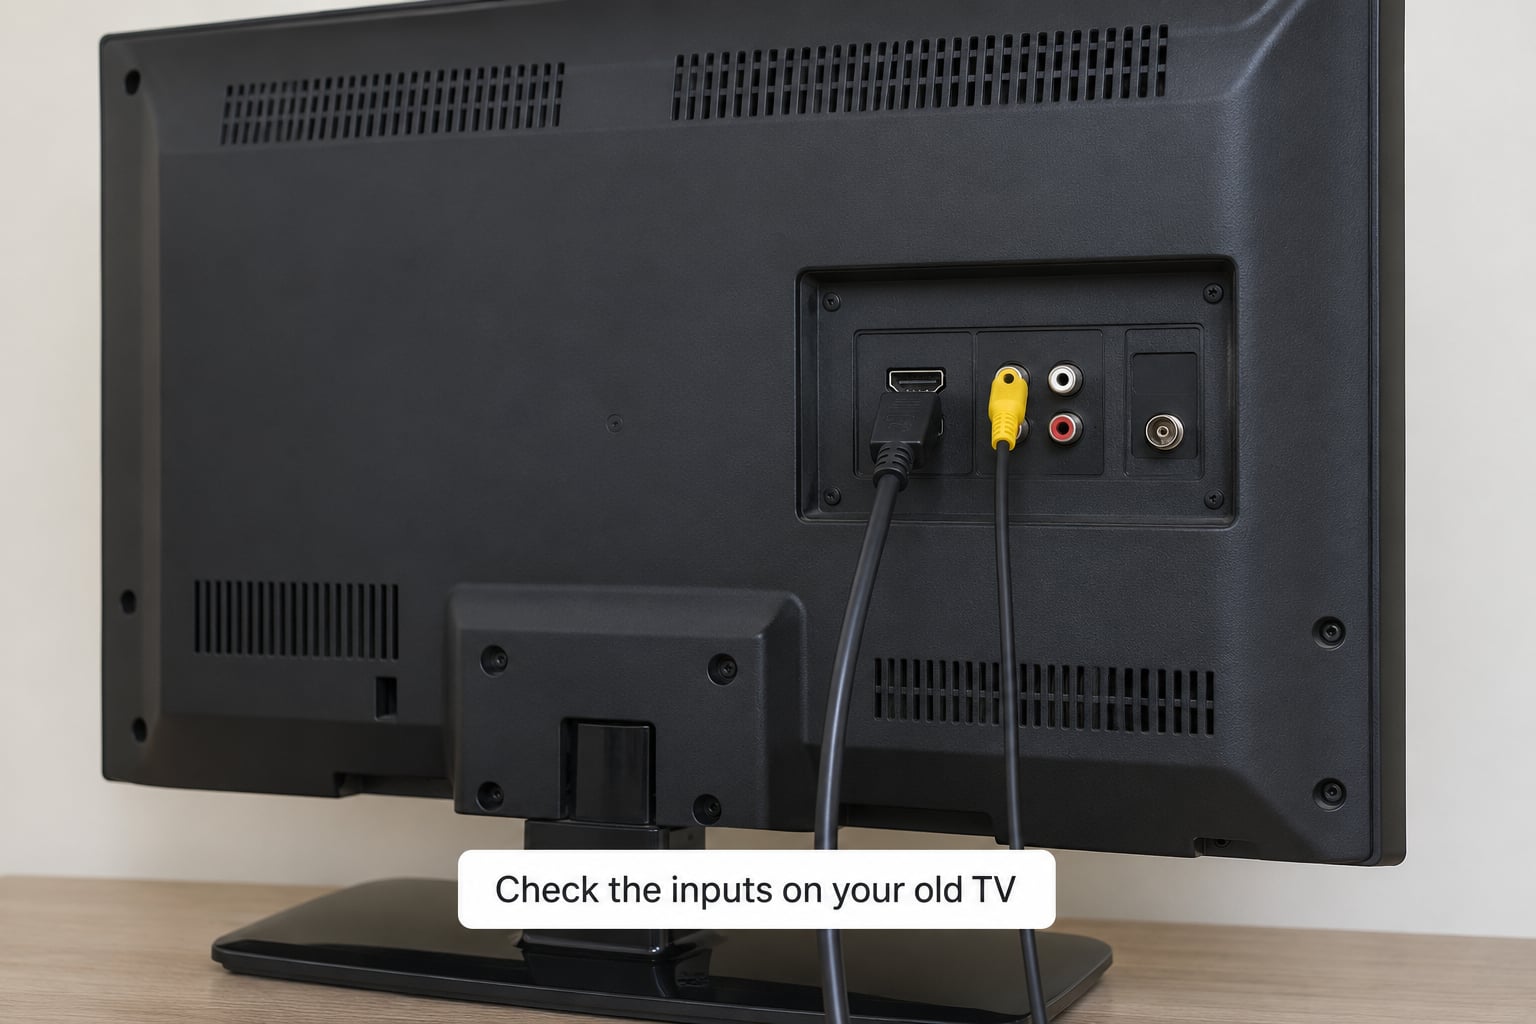
Look at the back or side of the TV and find the inputs. HDMI ports are flat, trapezoid slots, usually labelled HDMI 1, HDMI 2 or HDMI ARC, and they cluster together. If you see one or more, every streaming device on the market will fit.
If you only see composite (yellow, red, white) or component (red, green, blue), note the labels anyway. An HDMI-to-composite converter will work for standard-definition content, but it caps you at 480p or 576p, drops HD audio, and adds a delay you notice when watching sport.
Write down which input you used. Choosing the wrong source is the single most common reason a new streaming device appears to be broken.
2. Choose the right streaming device
There are four ecosystems worth knowing, and the differences matter more than the hardware.
- Roku OS devices run a very simple interface with no tiles cluttering the home screen, and the remotes tend to have fewer buttons. A good fit if the household watches different things on different days.
- Amazon Fire TV devices include Alexa in the remote, so you can ask for a show by voice. The home screen carries heavier advertising, though it can be switched to a plain app list.
- Google TV boxes, including Chromecast with Google TV, have Chromecast built in, so casting from your phone needs no extra hardware at all. The Google Assistant answers voice commands.
- Apple TV is the smoothest of the four and pairs with AirPlay, but it is the most expensive option and has the smallest app catalog.
Pick based on which services you already pay for and how you like to browse. A stick is the right choice for most people. A box with more storage and Ethernet is worth it if you download a lot of films or your Wi-Fi is crowded.
Skip the unbranded boxes with impressive spec sheets. Non-US hardware often runs region-locked app stores, which is the complaint that comes up most often when people compare cheap TV boxes.
3. Connect the device to the television
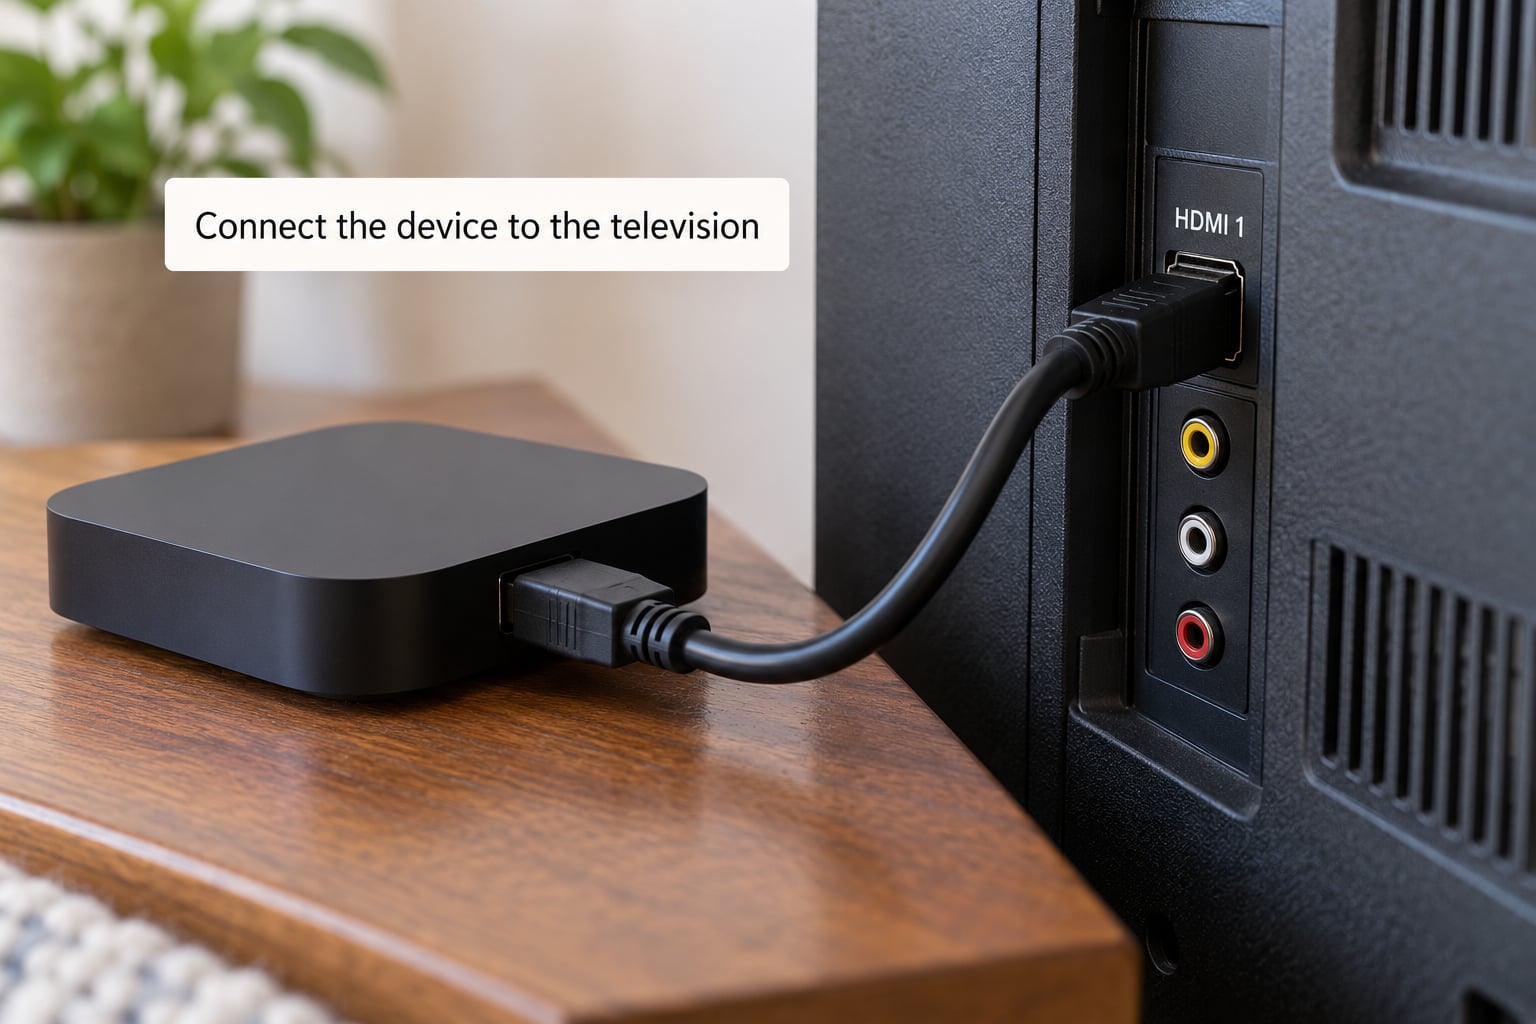
Plug one end of the HDMI cable into the streaming device and the other into the HDMI port you found earlier. The connector shape only fits one way, so if it will not go in, do not force it — flip it.
Now power the stick. Most come with a short USB cable and a wall adapter; some draw power from the TV’s own USB port, which saves a socket but sometimes produces a low-power warning on older sets. If you see that warning, use the wall adapter instead.
Take the remote from the box, press and hold its pairing button until the light blinks, and wait a few seconds. On older sticks, pairing means holding the Home button for 10 to 15 seconds until the remote light starts flashing.
4. Complete the setup and sign in
On the TV, press the Source, Input or TV button on your original remote and choose the HDMI input you used in step 1. Match the number on the screen to the port label on the TV, not the position.
The streaming device will show its own setup screen. Pick your language, connect to Wi-Fi, and sign in to your account. You can usually complete sign-in on your phone browser and have the TV activated by code instead, which saves typing a long password with the on-screen keyboard.
Once you are in, update the system software if it offers, then open the app store and install the services you want. Every main platform carries the big names — Netflix, YouTube, Prime Video, Disney+, Max and Apple TV+ are all on at least three of the four ecosystems.
Last, set your streaming account as the default player so the play button on your TV remote launches video apps instead of the live channel.
5. Test apps, casting, and advanced features
Play something for a few minutes and check three things: that video is smooth, that the sound comes out of the right speakers, and that you can control playback with the stick remote.
Then test casting. On Google TV devices, cast from your phone and look for the Chromecast icon in any video app. On Apple TV, open Control Centre or the AirPlay picker. On Windows, press Win+K and choose your TV. If you want to mirror a phone screen instead of casting a single app, use Smart View on Android or AirPlay on iOS, though some streaming apps block mirroring.
If you bought a box with an Ethernet port, try it before you judge the picture quality. A wired connection removes buffering and keeps 4K streams steady on a busy network.
Common Mistakes and How to Fix Them
The screen stays black after plugging in. Almost always the input. Cycle through every input with the Source button until the device home screen appears, and check that the TV is on the input you plugged into rather than the one beside it.
Picture but no sound. Check the volume on the TV first, because the stick’s own volume and the TV’s volume are separate. Then look at the HDMI ARC or eARC setting in the TV’s sound menu — switching that off can silence a digital audio path that was being negotiated incorrectly.
An app has disappeared from an older smart TV. This is not a fault in your TV. TV makers stop issuing updates once the app store for an older model has shrunk past the point where it is worth maintaining, and the app then becomes unavailable. Adding a streaming stick sidesteps it completely, because the app store lives in the new device rather than in your ten-year-old television.
Wi-Fi will not connect. Move the stick to the router’s 2.4 GHz band if it only sees 5 GHz, or bring the router closer for the first sign-in. Typing a long password with a remote is its own problem, so finish sign-in on your phone when the code option appears.
Buffering and dropped quality. Four fixes, in order: use Ethernet if the device has a port, move the router closer, restart the device by unplugging it for 30 seconds, and only then consider a faster plan. As a rough guide, standard definition needs about 3 Mbps, HD about 5 Mbps and 4K about 25 Mbps of steady speed.
The TV has no HDMI port at all. An HDMI-to-composite converter gets you video and stereo audio, but you are capped at standard definition and you add conversion lag. If your set is a CRT or an early 480p panel, a converter is a short-term fix at best. Also worth knowing: a USB drive with a media player makes a TV media-capable, not smart — you get no app store, no sign-in and no catch-up services.
It is time to replace the TV. Buy a new set if the panel has dead pixels, heavy backlight bleed, no HDMI, or if you want features like HDR, wide colour and a proper game mode that no external device can add. An external streaming device adds apps; it cannot add a better screen.
Frequently Asked Questions
Can you really turn an old TV into a smart TV?
Yes, as long as your TV has an HDMI port. A streaming stick plugs into that port, connects to Wi-Fi and runs the apps itself while your TV acts as the display. You get Netflix, YouTube, Prime Video and live TV services on a set that was never designed to run them.
What is the cheapest way to turn my non-smart TV into a smart TV?
The cheapest way costs nothing: cast from your phone, plug a laptop into the TV over HDMI, or reuse a console or Blu-ray player you already own. If none of those suit your household, a streaming stick is the cheapest permanent option and takes about 15 minutes to set up.
Will a Firestick turn a TV into a smart TV?
Yes. A Fire TV Stick plugs into any TV with an HDMI port, connects to Wi-Fi and gives you a full app store with Alexa in the remote. On a very old set it will look good, though the processor may feel slow compared with a newer box if you navigate heavy menus.
Can you use Chromecast on an old TV?
Yes. Chromecast with Google TV works on any TV with an HDMI port, because Chromecast is built into the device rather than dependent on the television. The original Chromecast dongle also works on older sets, but it only casts and does not run apps on its own.
Can you connect a streaming stick to a TV with no HDMI?
You can, through an HDMI-to-composite or HDMI-to-component converter, but you are limited to standard definition and stereo audio, and the conversion adds a small delay. On a CRT or an early flat panel, the loss in picture and sound is obvious enough that a new television is often the better call.
Can I get live TV on a streaming device?
Yes. Catch-up services like BBC iPlayer, ITV, Channel 4 and PBS run as apps on most streaming devices, as do live TV apps from cable and satellite providers. Availability depends on your country and on which service your subscription already includes.
Conclusion
The fastest path is simple: turn the TV around, find the HDMI port, and buy a streaming stick that suits the services you already pay for. Everything else — the console under the TV, a laptop over HDMI, casting from your phone — is worth trying first because it costs nothing.
If the port is missing or the panel is failing, no device will fix that. Start by checking the inputs and the native resolution, and you will know within a minute whether your old TV is worth saving.